Mastering is the final important stage in music production. In Part 2 of our mastering tutorial we cover doing your own mastering, the loudness wards, compressors and limiters, and stereo enhancement.
Can I Do My Own Mastering?
There’s no reason why you can’t use your current DAW system as a starting point for your mastering session, provided you also have access to a few suitable plug-ins that can apply the overall EQ, compression and/or limiting required. Just load your mix into any stereo track, and then reach for the drop-down menus for the plug-in you need.
On the other hand, a dedicated mastering suite or a wave editor like Wavelab (previously just for PC, but version 7 now accommodates Mac systems as well) allows you to focus on the job in hand without all the extra distractions of a full DAW package—which is, after all, mainly designed with multi-tracking in mind.
In WaveLab there are a variety of sonic tools that can help you assess your progress; a full-range spectrograph, tools for checking phase as well as accurate volume measurements.
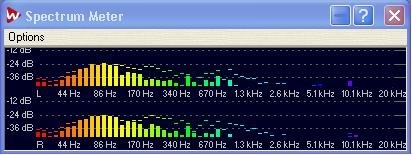
Wavelab has some useful monitoring tools (spectrum meter)
The Loudness Wars
A critical aspect of mastering is about squeezing or narrowing the dynamic range, and lifting the overall level of the track to give it a punchiness that equates with commercial tracks of a similar genre. But what happens if you squash your track too much?
Veteran producers have long been complaining that track average levels have been steadily increasing over the years, as each new act tries to make their tracks stand out from the crowd. The result can be an overall sound that is unyieldingly loud and harsh, with almost no dynamic ‘light and shade’ to speak of.
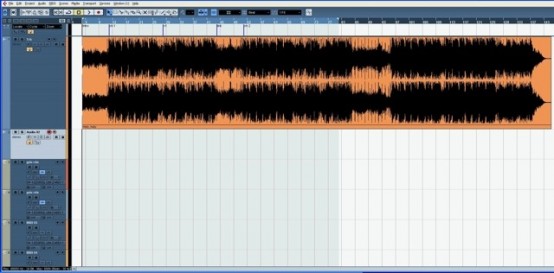
Try ripping a modern commercial pop track and then opening it in a wave editor. Many times the wave will look almost solid, as the producer has arranged for the mastering to be as ‘hot’ as possible. Most radio stations use their own processing to boost volume levels, so this combination can be a recipe for disaster!

Hot and Spicy, But Not Too Hot!
There’s no ‘one size fits all’ solution to this problem. It makes sense to master your tracks reasonably firmly—after all everyone else is doing it, so you can hardly afford to be left behind.
In any case, modern day audiences are now used to listening to strong compression levels. But do try to avoid reducing dynamic range to the point where harshness and clipping become an issue. Try to preserve a ‘natural’ sound to your music; turning up the heat too much will actually alter the sound of your track permanently and quite possibly in a detrimental way.
Remember, the listener can always turn up the volume on their own listening device. Most people don’t listen to music at ear-splitting levels anyway, so they have plenty of headroom to turn up that gently mastered track.
Mastering Compression and Limiting Explained – Terminology.
Before we go any further, let’s have a look at some of the basic terminology that comes up when discussing mastering.
Compression
Compression reduces—or ‘squashes down’—the level of the loudness peaks in your music according to a set ratio; the make-up gain applied after setting the threshold and ratio raises the overall levels, so the end result is that the music ‘lives’ within a much reduced dynamic range.
‘Soft knee’ compression settings are more usual in mastering applications, where the ratio is applied gently at the threshold point, and ramps up to its marked setting as the volume steadily increases, rather than ‘hard knee’ where the ratio kicks in suddenly right at the threshold point.
Limiting
Limiting is actually a type of ‘brick-wall’ compression (the ratio is merely set to maximum; or infinity:1). It sets a fixed level beyond which the upper limits of the sound cannot pass; a quality limiter will also apply some soft clipping to these peaks so that any distortion is avoided.

Two graphs comparing ‘hard knee’ and ‘soft knee’ compression
When in the mastering stage, compression is always applied to the whole stereo mix, rather than to individual channels. Consequently, it needs to be done with rather more subtlety. Care is needed, as the music will most probably have already been compressed to some degree at the tracking and mixing stage.
What’s needed now is an overall process that can lift the track to a suitable level that bears comparison with other tracks in a similar style. It’s not just about loudness or EQ, either. The track needs to sound good on a whole variety of hi-fi speaker systems with all their strengths and weaknesses!
On most commercial albums, the quiet sections of the song are clearly audible when compared to the loudest parts. In fact, the overall dynamic range of the songs has been reduced, or levelled up. That is to say, the average or mean level of loudness is now much higher that it was in the original mix of the song. That’s why you perceive it as louder.
In pop music, the average loudness might have been raised by anything between 6 and 10dB, which is actually quite a lot! So the track now sounds considerably more punchy and ‘in your face’—but the trade off is some of the overall dynamic range has been lost.
Modern audiences have become used to this; hence the increasing trend in recent years for mastering at maximum possible loudness levels.
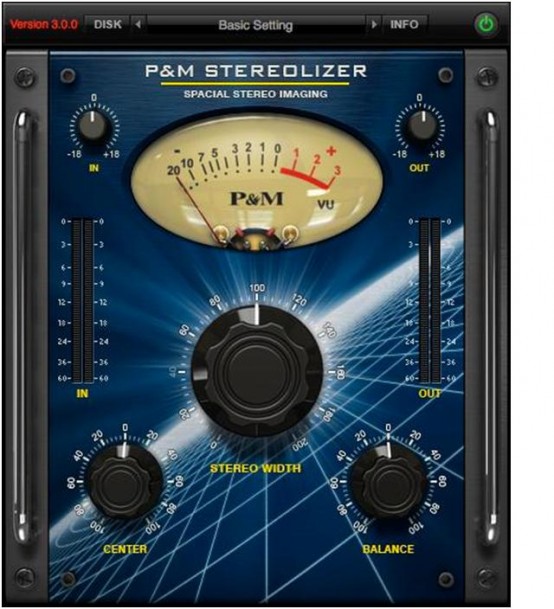
What Is Stereo Enhancement?
Any stereo rock or pop track will contain some audio aspects that are panned centrally, like the lead vocal and the kick and snare drums. Other elements (like guitars or backing vocals) are panned off to either side, and therefore sound different in each speaker. Either they feature more on one side of the track, or an effect added to the sound (like chorus) makes a sonic difference in character to each side.
Stereo enhancement can ‘widen’ your music’s perceived stereo field by emphasising or lifting the level of the stereo elements in relation to the central mono component of the track. Adding a little stereo enhancement at the mastering stage can widen the overall sound and create a more involving experience for the listener, but the risk of using this ‘effect’ at the mastering stage is that some of the ‘punch’ of the kit and other central elements is lost, along with the natural ‘phase’ of the track.
Use stereo enhancement on some arrangement aspects at the tracking stage by all means, but only sparingly when mastering!