There are quite a few ways to tweak your home studio setup, in this post we will cover some ways you may be able to get more out of your space, even if working on a tight budget.

1. Use a Mat or Carpet
If you have wooden or tiled floors in your studio consider putting a thick rubber backed mat or carpet mid way between you and your monitors. The floor is not always considered when the acoustics of a room are spoken about and yet it is a source of accuracy reducing reflections. A deep shag pile carpet or mat would be a good way of absorbing some of the reflections from the floor surface. This is especially so in the highs and upper mid-range. It is the opposite of a ceiling cloud. This will also be able to break up any flutter echoes that may be present.
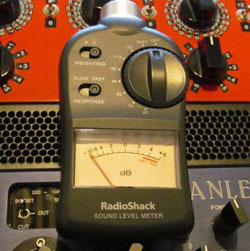
2. Buy an SPL Meter
When you are mixing can be useful to take into account the Fletcher Munson equal loudness contours. The ears’ internal frequency response flattens as the monitored audio reaches 85-90 dB SPL. Do you know what 90 dB SPL sounds like? I thought not. You can buy an SPL meter for around £30-40.00 (US$60.00 / AUD 60) and it will allow you to measure this all important level. You do not need to mix at this volume all the time but it is recommended to check your mix balance and bass content at this volume for at least a portion of the mix down duration.
3. Add a Single Driver Speaker to Your Setup
A single driver speaker can help you make more effective mid range balance decisions. Often there are a lot of sound sources fighting to be heard in the mid range and a single driver mid range speaker can provide a clear insight into the instrumental balance in this all important region. Main studio monitors are great for checking stereo image and the details of your mix, but sometimes less is more and a single driver clarifies and makes decisions on important aspects like vocals and snare level easier for the ear to discern.
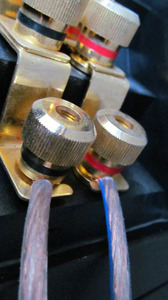
4. Use 12 AWG Gauge Cable to Your Speakers
Have you checked your speaker wire lately? If not I recommend using 12 AWG gauge cable as the minimum thickness cable to driver your speakers with. This will provide a low resistance connection and ensure all the power from your amplifier is delivered to your speakers. There is no need to purchase extremely expensive hi-fi cable but a good standard oxygen free copper cable is a good way to keep your system sounding tip top. OFC copper strands mean that the ends connected to the amplifier and speakers will not oxidize as rapidly as standard copper and keep a clean connection for longer.
5. Go Passive to Avoid Distortion
Passive volume controllers can in some situations improve the sound quality of your monitoring. You can bypass hi-fi amplifier pre-amps and go “direct” into the power amplifier section (assuming that connection is available on your amp) avoiding the distortion inducing tone and pre-amp controls. You can also avoid using an active monitor controllers circuits which are often based on cheap low grade materials. You can avoid this ambiguity by using a passive volume controller. A PVC is a simple box with a high quality passive volume control (Variable resistor) in it and often a mute switch. These tend not to colour the sound as they are passive in nature and do not use any electricity. They are simply installed between your DAC (digital to analogue converter) or sound card and amplifier.
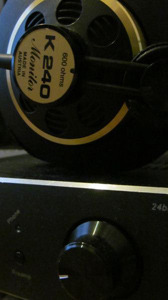
6. Use a Headphone Amp
Do you use headphones a lot? If so you could benefit from buying a good quality headphone amplifier. You can find various DAC/headphone amplifiers on our favourite auction website. These DAC/headphone amplifiers often use much higher quality components and power supplies than are found in a typical project studio sound card headphone output (often based on one single and possibly underpowered budget opamp). The differences in headphone monitoring quality can be startling. Research which headphone amplifiers are popular from lower cost manufacturers and you could easily improve the quality of your headphone listening fidelity. There are headphone enthusiast specific forums online where you can get a lot of information, so check them out and research. This is especially good for those who have to mix on headphones and a good £100.00-£200.00 headphone amplifier can make a big difference to the clarity of what you hear.
7. Use a Headphone Cross Feed Plugin
Search your favourite search engine for “headphone cross feed”. A cross feed is a software plug in or electronic device that your headphones plug into and it can emulate the sound of loudspeakers in a room more accurately. Judging the stereo image is one of the down sides to mixing with headphones and a cross feed introduces some of the signal from the left transducer into the right and vice versa. This allows for a monitoring experience that is a perceptually a little closer to listening to loudspeakers in a room. When you think about it the sound coming from your left speaker never exclusively goes only into your left ear and vice versa. If you are handy with a soldering iron they are a reasonably easy DIY electronics project if you wish to make the electronic version otherwise a software plug in is the easy solution. Always take care to monitor at no more than moderate volumes with headphones.
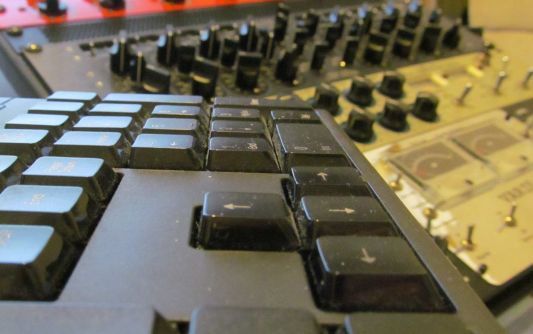
8. Buy a Computer Keyboard You Can See in Low Light
The sun is going down and your studio is dimly lit, time to change that black keyboard! We have all been there, squinting and angling our head to read the keys, keyboards used to be beige allowing you to see the keys much easier, we tend to think of working with music as being strictly auditory but we use the mouse and keyboard a lot. I have lost count of the times I cannot see the keys properly on a black keyboard. It’s a cheap and easy tweak to get a beige or white keyboard back in the studio.