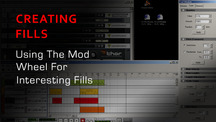

This post covers creating fills in Reason and using the Mod Wheel to create other interesting effects.
It is EASY to create variated and awesome beats in Reason using some very simple techniques. I know a lot of people are trying to create rolls and rhythm variation in the Sequencer, because I did. But this is unwieldy. While it can be effective, it is tedious and a black hole for time.
The Delayed Loop Method
My method for creating awesome drum patterns is to:
1. Create a delay on a Dr. Rex or Redrum.
2. Create a Sequencer Track for this Delay. On the Delay, adjust the Feedback setting to about 3/4 of the way full and turn the Dry/Wet all the way left.
Now, the fun part.
3. MIDI enable the Dry/Wet knob (Right click on the wheel, Select Edit MIDI Remote Mapping and make sure the “Learn from MIDI” box is checked.) Now move the Mod Wheel on your keyboard/midi controller. You should see the little blue bars at the bottom register respond to the wheel.
4. Start the device through the Transport Bar or by playing the instrument individually. I suggest loading a rhythm pattern you like out of the Dr Rex loops that came with the Factory Sound Bank for demo purposes and to play this in Preview mode from the Dr. Rex.
5. Now, move your wheel slowly but steadily on your keyboard. How about that? You can simulate DJ effects by moving the wheel back and forth quickly. You can also produce endlessly varied fills by letting the wheel “hang” in the middle for just a second, moving it back and forth and then slowly escalating the wheel to an appropriate level. The possibilities are truly limitless. (Try these steps with a Redrum loaded with special FX sounds. Mind blowing.)
Here are some other suggestions.
A Helpful Sequencer
Before we go any further, let me give you a tip that you may or may not know. Right click on the knob or slider that you would like to automate. Choose “Edit Automation”. Instantly the Sequencer shows you the Automation channel for that effect. It took me months to stumble on this. And I even read the manual..twice. Also, be careful when you edit the automation. Make sure that your MIDI symbol appears in that device’s track in the Sequencer, or your changes will not record for that device, but they will record on whatever track you still have selected.
Knobs/Sliders Default State
You also need to set the default state of the knob or slider that you have selected. I achieve this simply by taking the pencil tool and click anywhere in the Automation channel. The entire channel will suddenly be filled with a uniform blue bar that designates that the device is set to this level as its default state. Of course, you might have to adjust a little where you just clicked. Remember you are only clicking to set the default state, not to really draw anything.
Somthing To Try In Your Song
One other thing on this subject. Record your Dry/Wet adjustments in the channel. Try to come up with a rhythmic way to adjust the mod wheel. For an example, try this: in the third measure of a 4 measure loop, move the mod wheel quickly to halfway and as the third measure transitions into the fourth, move it back down. You should have seen this action recorded in the automation channel for the Delay device. Do this for however long you need to create your own loop of this varied drumbeat.
Stop recording.
Select Dry/Wet automation in the Sequencer window with your selection tool. I usually select four measures at a time. (When you select, make sure it is set to Bar and not to 1/64 or 1/8, etc. This will give you a precise cut on the bar.) Now you can copy these modifications and paste them one after another, or you can place them throughout the song.
Remember, you can do this for any automation, so you may want to group entire automations together for a device and copy and paste that way. Only your imagination limits you.
Practice To get Incredible Fills
Now, this is a great tip for an awesome break followed by a fill in your song. By using this technique you can create the break and then, with a little practice, come out of it with the most incredible fill you’ve ever made…at least, this easily.
On your Dr. Rex, locate the Decay slider under the Amp section. MIDI-enable this slider to your mod wheel on your keyboard. When you drop the slider to the bottom you get an awesome “squelched” variation of your beat. Now, with your slider at the bottom, adjust the Dry/Wet on the Delay you created earlier. You now can see that by automating these two knobs together you can produce endless fills of differing rhythm, intensities and variations. By turning up the Dry/Wet and the Decay in sync, or even a little out of sync, you can come out of that fresh break with a long and effortless fill. Awesome.
Amplify And Sharpen Your Drums
This next tip kind of goes hand-in-hand with the one above. This is how to amplify and sharpen your drums. You can use this technique in conjunction with a fill or when you want to focus the drums quickly and easily.
MIDI enable the mod wheel on the Dr. Rex to your keyboard. Now move the wheel all the way up. Did you notice a difference. Try adjusting the three little knobs under the MOD WHEEL section on the Dr. Rex. Now trying moving the mod wheel. You should experience a difference of amplitude. To increase the amplitude (volume) of the beat as you move the mod wheel up, make sure you turn the AMP knob under the MOD WHEEL section to the left. Play with those MOD WHEEL knobs on all of your instruments and a whole other world will open up for you.
Original Source: here.