If there's anything that's a golden rule about music production, it's this - there ISN'T a golden rule that applies to every situation. From that perspective, this post is not going to try and write a definitive post on compression, but rather give you some guide-lines that will hopefully help some of you make sense of what is to many people a very confusing subject. We're going to take this in a few parts, so as not to overload things from the start.
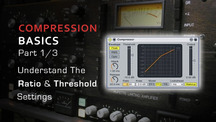
Compression simply reduces the difference between the loudest and quietest parts of a piece of music by automatically turning down the gain when the signal gets past a predetermined level. So, it's very useful when you need to tame peaks in your track and smooth out the overall levels of your various parts. Sure, you could do this manually by riding the fader of a particular element, but compressors allow for a much quicker and more precise response than you could achieve in this way. However, like all machines, a compressor will only react in the way you tell it to, and that means setting up the compressor properly to get your desired result. This requires a basic understanding of the main controls on your compressor. Let's start off by looking at the Threshold and Ratio.
THRESHOLD
If you are manually controlling the faders, the level above which the signal becomes unacceptably loud is determined by your discretion:if it sounds too loud you turn it down. In the case of a compressor, we have to 'tell' it when to "turn it down", and this level is known as the Threshold. On your compressor, the Threshold is varied via a knob or slider calibrated in dBs, and a gain reduction meter is usually included so you can see how much the gain is being modified. If your signal level falls below the threshold, no processing takes place so the gain reduction meter reads 0dB. If a signal exceeds the Threshold its level is reduced, and the amount of reduction is shown on the meter. Because the signal peaks are no longer as loud as they were, things will sound quieter, so in order to compensate, a 'make-up' gain is added after compression, to restore any lost gain. Your compressor most likely has a "make-up gain" button, which you should usually have engaged to account for this.
So to turn theory into reality - throw your compressor on audio channel and start by leaving the threshold all the way up and then slowly pulling it down. Not only should you hear the audio change as peaks are compressed, but you should also see the gain attenuation (the amount the peaks are being reduced) increasing in dB.
RATIO
OK, so that's the essential function of a compressor, the rest of the compressor's settings essentially modify this main function. One of the main ways to modify the compression is by the compressor's ratio. You will see ratios represented in this manner - 1:1, 4:1, 8:1 etc.
A helpful way to read ratios is like this:
Exceeds threshold by X dB : Results in 1dB increase at output
So, in a case of 1:1, this means that every signal that exceeds the threshold you have set by 1dB equally results in a 1dB increase at output after compression (hence 1:1 is NO reduction). A ratio of 8:1 means that every signal that exceeds your threshold by up to 8db is only going to result in an increase of 1db at output.
As you can see, the higher the ratio, the more compression is taking place - or the more elements exceeding your threshold by a large amount are being squashed down.
So what if we set the ratio at infinity:1? This is essentially what a limiter is - any signal that exceeds the threshold by no matter how much is only going to result in an increase of 1dB at output, meaning you can push you signal right up to just below clipping and get a LOUD result. Of course, if overused the downside of this is that you are loosing a LOT of the dynamic range and natural fluctuations in levels out of your music, which can be very lifeless and tiring - but that's another post.
Original source here.