
It’s one of the most talked about synths in the world, and for good reason – Xfer Records’ Serum is a straightforward piece of software, but at the same time it’s one of the best VSTs out there – one of the most powerful, great-sounding tools out there to help you make better music.
What’s So Special About Serum?
On the surface, Serum might seem like a lot of other synths. It’s true – you can find many VST plugins out there that have more oscillators, more LFOs, and other functions, but Serum’s ability to put just what you need front-and-centre has helped it become a go-to synth to call up time and time again. There are also plenty of ready-made Expansion Packs for the synth to boost its capabilities.
Despite this, there’s still a learning curve to Serum. We’re going to help you ascend that curve quickly and get going with Xfer Records’ uber-synth. Once you’ve installed the synth, it’s time to get going. No more waffle – time’s a-wastin’.
In This Guide
— 1. Launching Serum and Selecting Presets
— 2. Exploring the Oscillators
— 3. Applying Modulation
— 4. Drawing LFO Curves
— 5. Envelopes
— 6. Serum’s Filter
— 7. Further Functions
1. Launching Serum and Selecting Presets
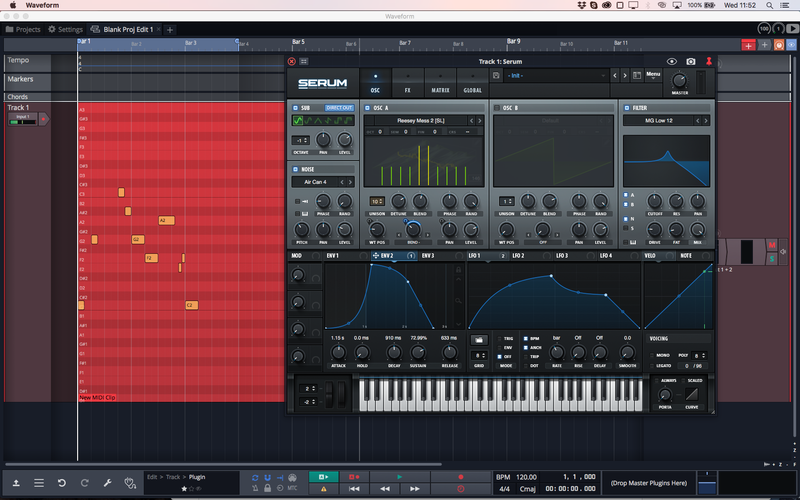
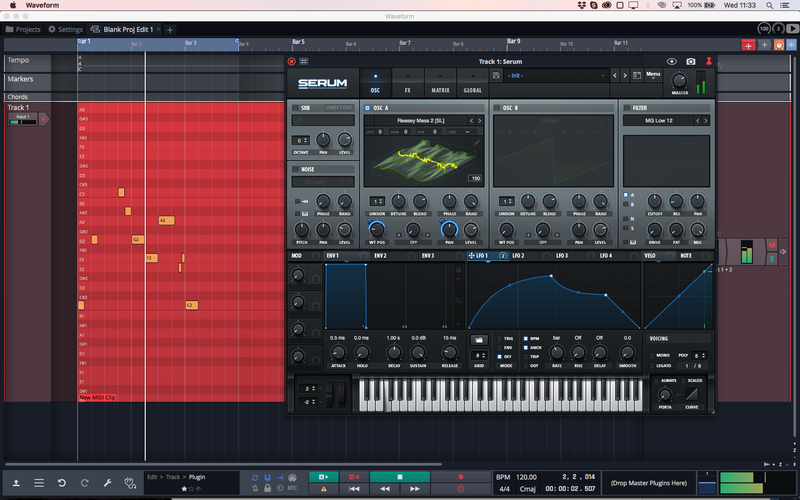
Once installed, Serum can be found in your DAW’s Browser as an Audio Unit, AAX or VST plugin. If it’s not there, restart your DAW. Load the Serum VST (or other format) onto a MIDI channel – it won’t make any sound until you feed it some MIDI notes via that channel in your DAW, whether through programming MIDI or via an external MIDI controller. The sound you get from this initialised patch should be pretty basic.
Let’s select a preset to begin to discover what Serum is capable of. Either start clicking on the left and right arrows at the top right of the interface, or click on the preset name to bring up a more comprehensive way to select your sound from the factory sound bank.

2. Exploring the Oscillators
Select the LD In Your Face patch from the Leads category, and take a look at the two oscillators – OSC A and OSC B. These are the main parts of the synth that produce the sound; most other sections are about changing that sound once it’s been produced here at the oscillators.
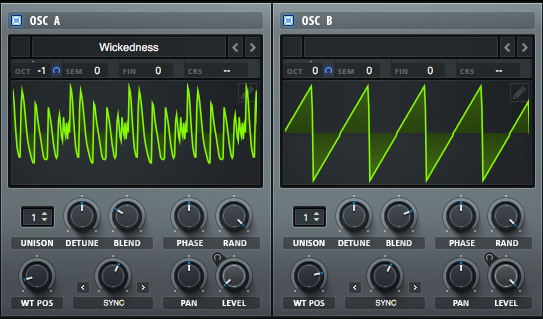
We can change the wave each oscillator is playing using the menu at its header. Changing them for this patch creates a bit of a different sound, but not hugely – this particular preset is characterised by its heavy use of effects.
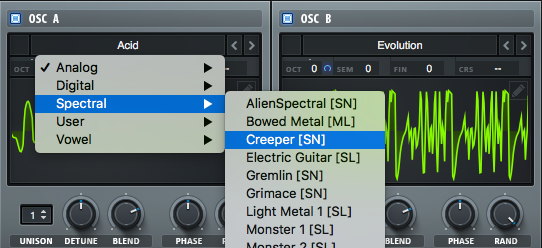
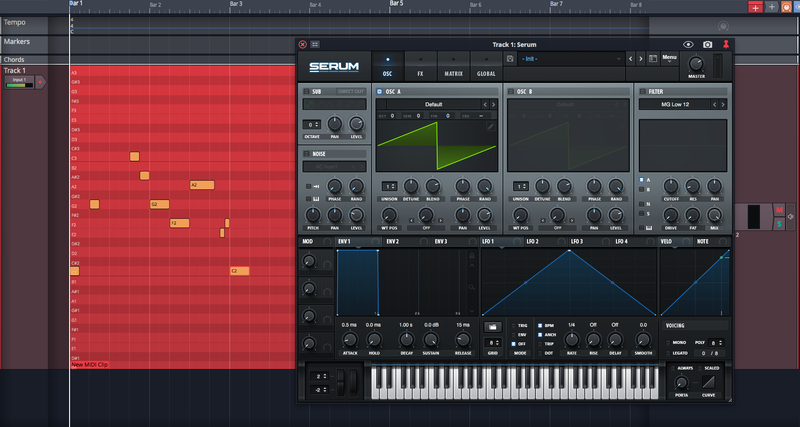
Now head to the Menu at the top-right, and select Init Patch, then select Init Modulations, to arrive back at the setup we had when we loaded Serum. For OSC A, select Spectral >> Reesey Mess 2 of the wave, then slowly move OSC A’s WT Pos knob up and down while Serum is producing sound. You’ll see the wave change shape as you do this, and more importantly, you’ll hear the result the changing wave has on the sound.
To shed even more light on what’s happening, click on OSC A’s wave itself, and the view will change to a 3D view. This shows a little more clearly what happens to the sound when you use the WT Pos control.
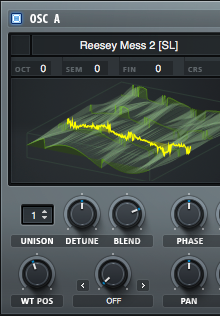
The full name of the control is ‘Wavetable Position’. Xfer Serum is a Wavetable synth, and each selection you make for the oscillator wave is actually a selection of an entire bank of waves, which you move through using the WT Pos control.
3. Applying Modulation
Why sit there waggling the WT Pos control when you can have Serum do that for you? Find where it says LFO 1 in the centre of the synth, and click-drag from that rectangle to the WT Pos control.
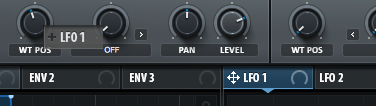
Once this is done, a blue ring should appear over the WT Pos control (if not, try again and try setting WT Pos to its lowest setting). Now when you play a note on Serum, the wavetable position in the oscillator display will start moving on its own – it’s being controlled by LFO 1, which is Serum’s first LFO (Low Frequency Oscillator).
4. Drawing LFO Curves
In the LFO panel (the right-middle blue grid in the centre of the interface), we can start changing the shape of this LFO signal, and therefore the behaviour of the WT Pos knob as we hold down notes.
Click and drag a node to change its position, double-click to create a new node, and drag the blue nodes between light nodes to create a curve shape between nodes.
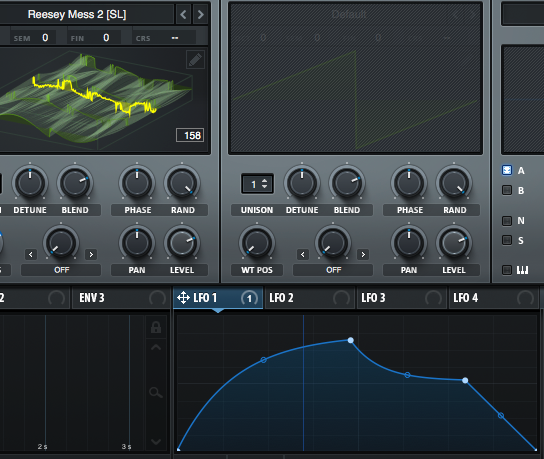
Change the Rate knob below to make this LFO move quicker or slower. Naturally, this has the same effect on the movement of the wavetable position. Try assigning LFO 1 to OSC A’s Pan control as well, so it’s now affecting the wavetable position and the panning of the entire oscillator.
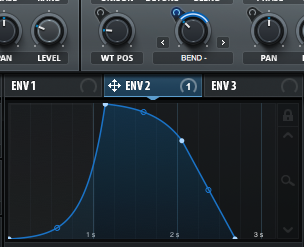
5. Envelopes
We’re just scratching the surface of what’s possible with Serum, but what we’ve covered so far is the blueprint for everything. We can switch OSC B on and select a second wavetable, and we can modulate any parameter using the first LFO or up to seven more LFOs which we can set to completely different shapes.
Envelope modulators (the left-hand blue signal plot) are similar to LFOs, but these are retriggered at their start by any played MIDI note, rather than being a consistent signal. Serum’s three envelopes are drawn in the same way as its LFOs. Env 1 is hard-routed to the oscillators’ volumes, although you can assign it to additional parameters and change its shape, of course.
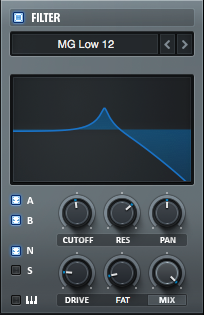
6. Serum’s Filter
Engage Serum’s Filter by illuminating the Blue light in the top left of that panel. The most important controls here are the Cutoff and Res(onance) parameters, which work similarly to other Filters in your DAW or in instruments and effects. You can choose which oscillators are routed through the Filter using the A, B, S and N buttons (OSC A, OSC B, Sub and Noise). The filter Cutoff is one of the most obvious and satisfying controls to modulate.
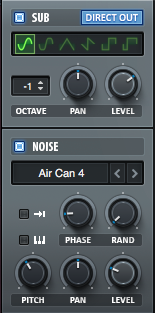
7. Further Functions
In this Quick-Start guide, we’re not concerning ourselves with every single parameter on Serum, but you should now be caught up enough to create interesting sounds and adapt some of the factory patches. So what’s next?
Once you’re accustomed to the features we’ve pointed out so far, check out the Sub and Noise oscillators in the top left of the synth to add some extra tones to the existing oscillators. The FX tab at the very top offers a choice of ten effects to apply to your patch, with their control readily tweakable.
Dive deeper into the Oscillator controls by raising the number of Unison voices and trying the Detune and Blend parameters to improve the stereo spread of your sound. There’s also Warp controls, set to Off by default but offering a choice of functions to mess with the oscillator waveform.