
In this Cubase tutorial, I’ll show you how to send multiple audio signals to the free Voxengo SPAN frequency analyzer so you can compare frequencies.
Being able to see multiple separate frequencies at the same time is very useful for when you have sounds that share a similar frequency range like the kick and bass for example. This is also a good thing to have set up in your default project.
1) If you don’t already have Span go to here to get your free download.
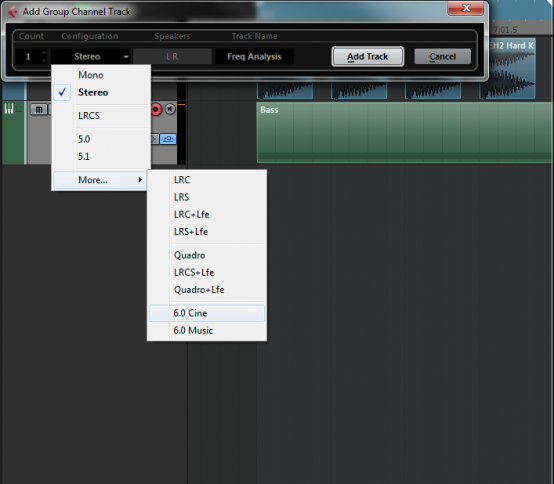
2) Right click or go to Project – Add Track – Group Channel to open a new Group Channel. Choose how many channels you want to use from the box that appears using the “Configuration” list. In this example I am going to choose 6.0 Cine which will give me 6 audio channels (L, R, C, Ls, Rs, Cs). Name it and click “Add Track”.
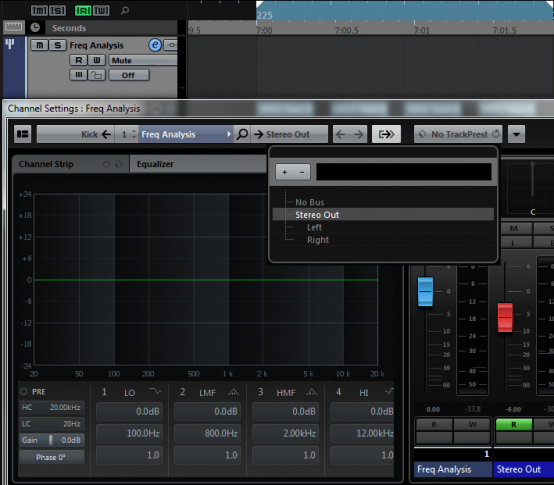
3) Click the “e” button in the inspector to open the channel settings window. At the top of the Freq Analysis group channel there is a box which is used to select where the channel outputs it’s audio to. Select “No Bus” from the drop down list as you do not want to hear the audio
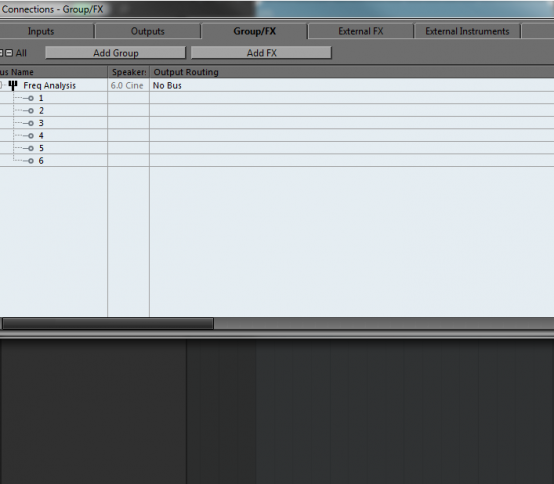
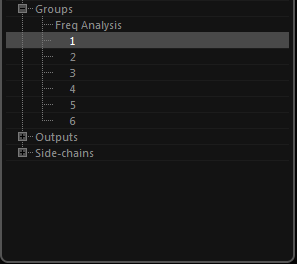
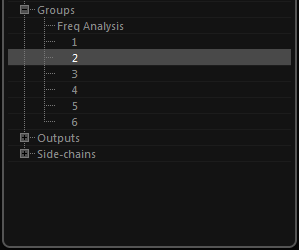
4) Hit “F4″ or open the “VST Connections” window from the “Devices” menu at the top of the screen. Choose the “Group/FX” tab. Locate Freq Analysis in the “Bus Name” column and right click on it. Select “Add Child Bus to Freq Analysis” and then choose “Add All Mono Child Busses to Freq Analysis” from the list. A list will appear under Freq Analysis in the Bus Name column showing all the available inputs, which are now all mono. Rename these inputs labelled Left to Centre Surround, to 1 through to 6. You will now have a group channel called Freq Analysis which has 6 mono inputs labelled 1 through to 6.
5) Load up SPAN as an insert on the Freq Analysis group channel.
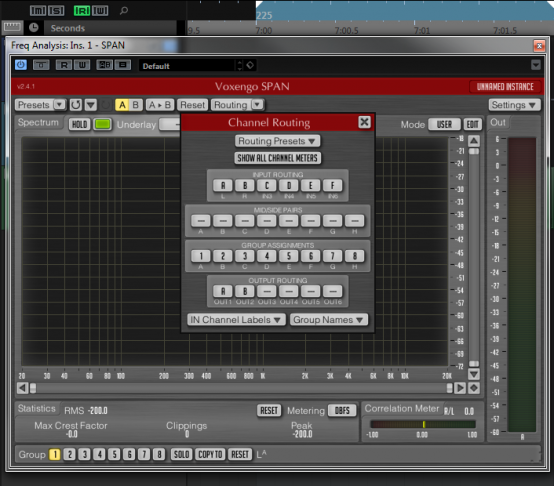
6) Click on “Routing” at the top of the SPAN GUI. A box will appear showing inputs and outputs. In the “Input Routing” section you will see 6 inputs labelled L,R, IN3, IN4, IN5, IN6. These are the 6 audio inputs available to SPAN. You have 6 audio inputs available because you created a group channel with 6 audio inputs. Currently L and R are routed to A and B. Route IN3 to C, IN 4 to D, IN5 to E, IN6 to F.
In the GROUP ASSIGNMENTS section route A to 1, B to 2, C to 3, D to 4 , E to 5 , F to 6. Close the Channel Routing window. You can now see 6 Group buttons available at the bottom of the SPAN GUI labelled 1 to 6. These Group buttons will now switch between the 6 audio inputs into SPAN.
7) Now you can route audio into SPAN. Select the tracks you want to route to SPAN. For this example I’m going to use Kick and Bass. Click on an open Sends slot on the Kick track and then go down the list of available channels to send to and you will see, under “Groups”, SPAN with 1 to 6 listed below it. These are the mono audio inputs that you labelled 1 to 6 previously. Select “1″ for the Kick. Then do the same on the Bass track except select “2″ instead of “1″.
Kick Send
Bass Send
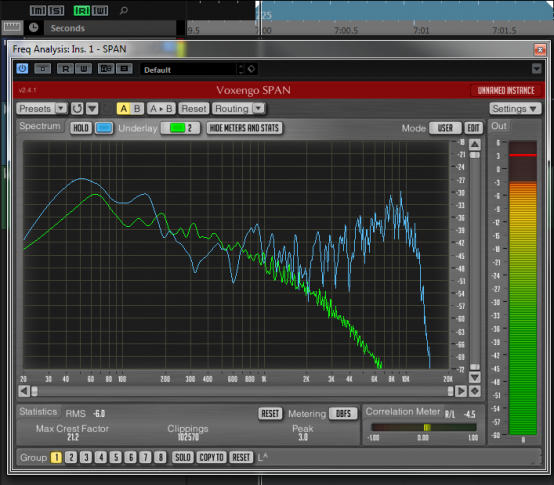
8) You can then use the “Underlay” function in SPAN to view the two channels at the same time to compare their frequencies. For this example, I colored the kick blue and the bass green.
Original post source here