This quick Acid Techno kick tutorial will demonstrate creating an acid Techno kick reverb effect in Reason and how you can use some effected reverb returns to create a nice pumping kick/bass line like you might hear in UK acid Techno. Even if you’re not interested in this style of music, there are some interesting ideas here for effecting your reverbs which can be translated across different styles and genres.
Step 1 – Choose a Kick Drum
The first step is to create a Redrum drum machine, and load in a kick drum. For this style of music the Roland TR808 and TR909 drum machines were really popular, so I have chosen a nice meaty 909 kick. I’ve also set the tempo of the track to a healthy 140 BPM. It’s important to set the tempo at this stage, as this will affect how we program our reverb.
Step 2 – A Little Processing
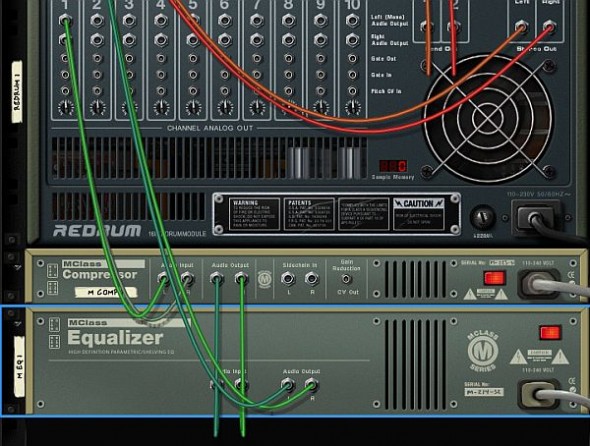
I’ve taken the drum out of the back of the Redrum on its dedicated output, and I’ve applied a little compression and EQ, just to keep things nice and solid. These screenshots should give you an idea of how I’ve set my devices:
The compressor is acting to tighten the drum, holding it in place, then I’ve dialed in a little bass at 94 Hz just to really make things thump.
Step 3 – Applying Reverb
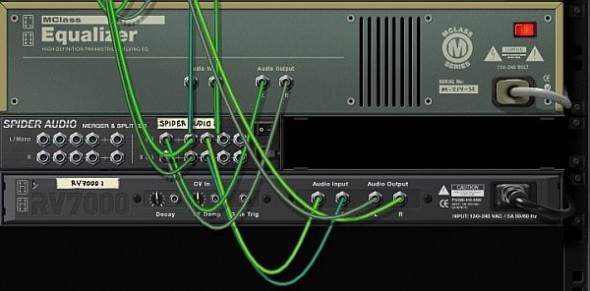
To get some extra control over the reverb I’ve used a Spider Audio Splitter to copy the signal of the kick drum. One split goes right back to the mixer, the other to a separate channel, via a RV7000 reverb unit.
I’ve chosen the basic ‘ALL 1st Hall’ patch from the factory soundbank. At the moment it sounds pretty terrible!
Step 4 – Getting the Timing Right
To get the effect we’re looking for we need to time the predelay control on our reverb to fit with the tempo of our track. The predelay is the amount of time it takes for our first reflections to come back to us, and effectively is the time between the dry sound occurring and the reverb beginning. You can adjust this control in the programmer secion of the RV700.
I’ve settled on a predelay of 104 ms, but this will vary depending on the tempo of your track. I’ve also lowered the decay parameter to 55 to allow the reverb tail to have mostly dropped off by the time the next kick hits.
Step 5 – Affecting the Reverb
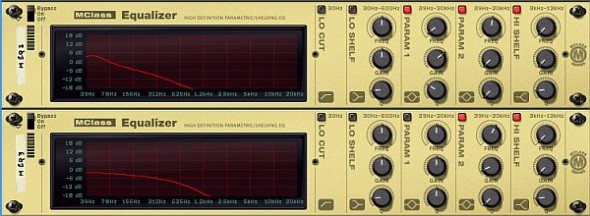
Now the timing is right, we need to work on the sound of the reverb. First of all, I’m going to take out the top end from this reverb, it’s far too trebly at the moment. I used the M-Class EQ with some pretty aggressive settings to really cut the top end. I decided this wasn’t enough, so I’ve layered a second EQ with similar settings over the top to really kill the top end of the reverb.
That sounds a lot better, but I want to add some interest. I’ve added a low pass filter to the chain, with a little resonance. I’m making use of the remaining high frequencies to sweep around, adding a subtle building sensation to the sound. This is great for helping build your arrangement.
A Few Extra Ideas
To add more interest to this sound you could experiment with some other effects like flangers and phasers. You could also consider sidechaining the reverb return against the kick drum which would result in a cleaner, snappier effect. If you just want some low end filler try switching out the EQ for a low pass filter to completely kill the top end.
Original source http://audio.tutsplus.com/tutorials/production/creating-an-acid-techno-kickreverb-effect-in-reason/


