A friend brings you a multi-tracked session recorded with another DAW. Before diving in to the mix, send him looking for coffee and a newspaper, and take time to organize your project and optimize the work area. You will save time and gain in efficiency. Some say “Less is more.” Now let’s say “No stress, good mix!” Be more organized before mixing with Cubase!
Step 1: Import the Audio Tracks
Before importing the audio files in the DAW, let’s have a look at those files. Are they WAV or AIFF? Are they OMF? The files’ format depends on the way your friend exported from his DAW.
OMF (Open Media Format): When importing this file format, the DAW recreates the same project and puts all the audio files along the timeline in the proper order with the correct track names. Note that this file format does not capture effects data.
WAV or AIFF: If the export of every track has been done with this file format, all the tracks have to start at the same point. Otherwise you won’t be able to line up the files at the same start point.
Start with an empty project. Hit <ctrl + N>, select your project folder and hit OK. Under the menu File, select Import Audio file and look in your hard disk to select the bounces.
If you import the tracks one by one, you will have to create an audio track beforehand. You can select all the tracks you need by holding the <ctrl> key on your keypad.
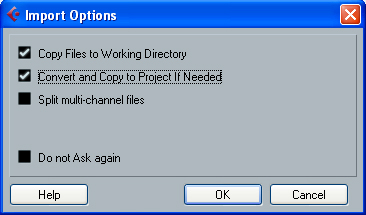
At this point, make the good choice in the Import Option windows:
Select “copy files to working directory”. All the audio files will be copied and stored in the audio folder of your project.
Selecting “Convert and copy to project if needed” will convert the audio files to the same sample rate and record format you previously set in the Project Setup.
Some Cubase users set the project at 32-bit floating point (adding extra 8 bits full of zero), arguing that all internal processing in the application are done at 32-bit floating point, which means there is no bit depth conversion during processing. The gain is not clear but the impact on the storage capacity is really clear!
Selecting “split channels” allows you to decide if you want separate a stereo track to two mono tracks.
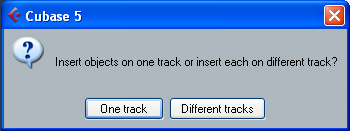
The next window gives you the choice to insert the audio files on one track or insert on different tracks – select “different tracks”.
Insert objects option
Step 2: Organize the Tracks
We all remember our mother saying “Clean your room!” We thought she was wrong when we were young, but for a mix, she’s so right!
Let’s have a look at the project:
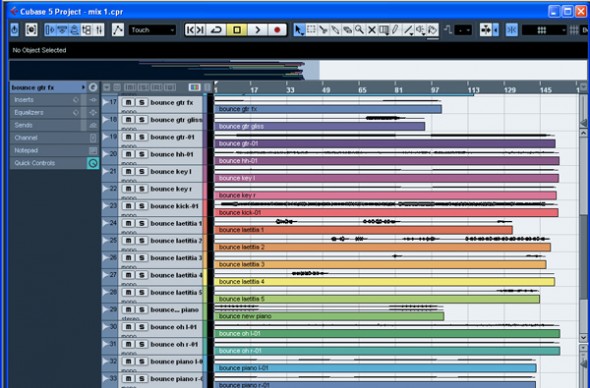
As you can see, all the tracks are completely disorganized. They appear in the order you selected them. Some guitar tracks are followed by keyboard tracks, drum track, vocal tracks, piano tracks, drum tracks again, and piano…
Set all the audio tracks in the common order most of the front of house engineers use: First, all the drums tracks (kick, snare top, snare bottom, hh, toms and oh), then the bass tracks, then guitars tracks, then the ‘extra’ instruments (keyboards, strings…) and finished with the vocals tracks.
To do so, drag and drop the kick drum track to the top of the track list. As you move a track on the track list, two green horizontal lines appear. Use the same technique with your project tracks.
Step 3: Rename the Tracks
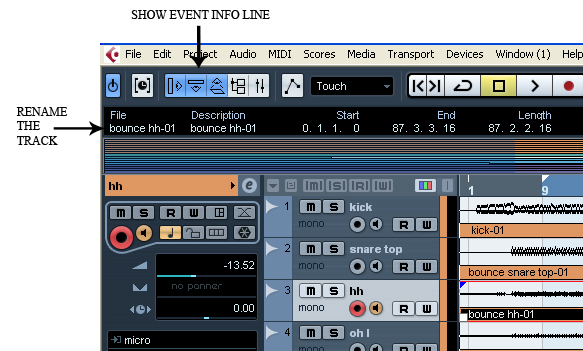
Take the time to rename tracks as you want to. If there is only one kick drum track, why keep a track called “bounce kick-01″? Rename it “kick drum” for example. You just have to double click on the name in the track list to edit it.
At the same time, if you want to rename the track in the event display, select the track, click the Show Event Info Line icon in the toolbar and double click on the name under ‘File’.
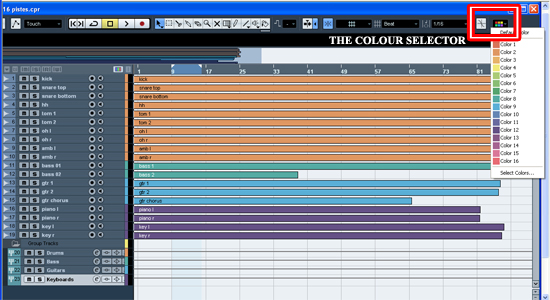
You should add some colors to your tracks for easier overview.
You have two options:
- Eat some pills and paint your tracks like a rainbow, really nice!
- Or decide to colorize all the drum tracks in one particular color, bass tracks in another color, guitar tracks in a third color…
Select the first drum track (which should be the kick now), hold [ctrl + shift] and click on the last drum track. All the drum tracks are now selected. Choose and apply a color from the color selector in the toolbar located on the top right of the project window.
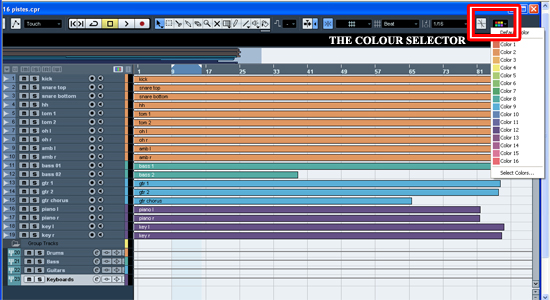
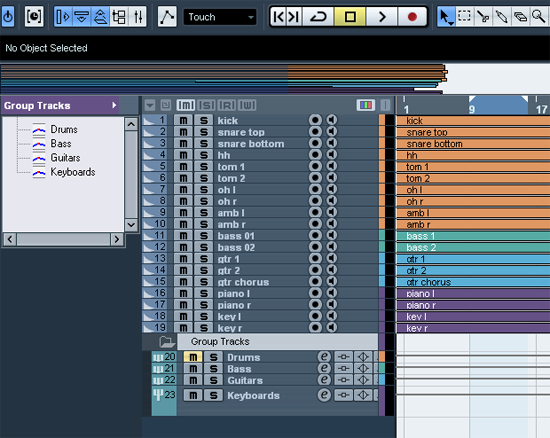
At this point, all the tracks are organized, renamed and colorized.
Step 5: Group Channel Track
Using group channel tracks is very useful for mixing. By routing several audio channels to a group channel, you can submix them, apply the same effects and equalization to all of them. Let’s create these tracks and see the benefits.
In this example project we have 10 drums tracks, 2 bass tracks, 3 guitars tracks and 4 keyboards tracks. So we create four group channel tracks.
Do a right click in the track list, select “Add Group Channel Track”, set the count to 4, select Stereo and click OK.
Rename the group channel tracks as ‘Drums’, ‘Bass’, ‘Guitars’ and ‘Keyboard’, set the colors of your choice (the same as the corresponding audio tracks or different one) and place these four group channel tracks at the end of the track list as it is physically placed on an analogue mixing desk.
To route the output of an audio channel to a group, pull down the output routing pop-up and select the corresponding group.
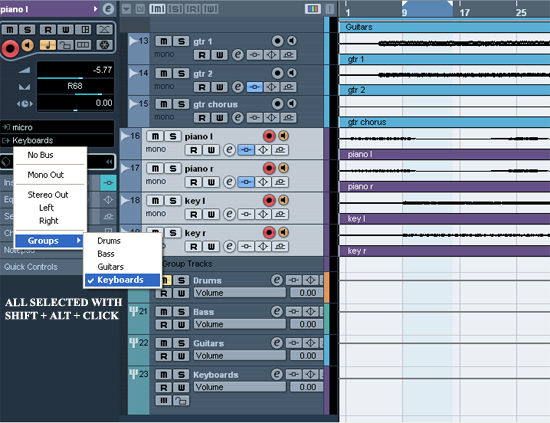
If you want to route multiple audio channels to a group at once, select all the tracks needed, hold Shift+ALT and click on the output routing pop-up to select the group.#
Step 6: Solo a Group
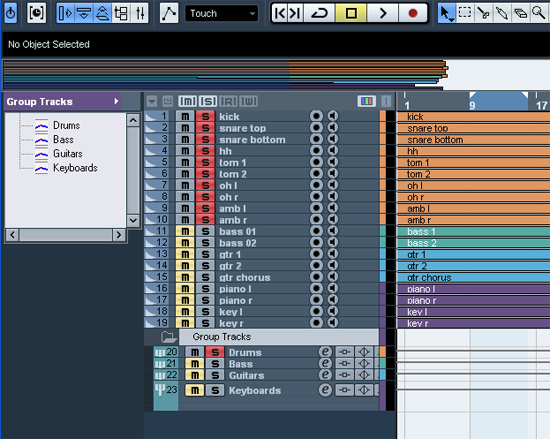
If you solo a group channel, all channels routed to the group will be automatically soloed as well. Soloing a channel routed to a group will automatically solo the group channel.
Note that if you solo a group or channel routed to that group, any channels which have AUX sends routed to other group channels, FX channels or output busses will be muted.
In the example below, the solo button on the drums group track has been activated.
Step 7: Mute a Group
If you mute a group channel, all channels routed to it will be muted as well.
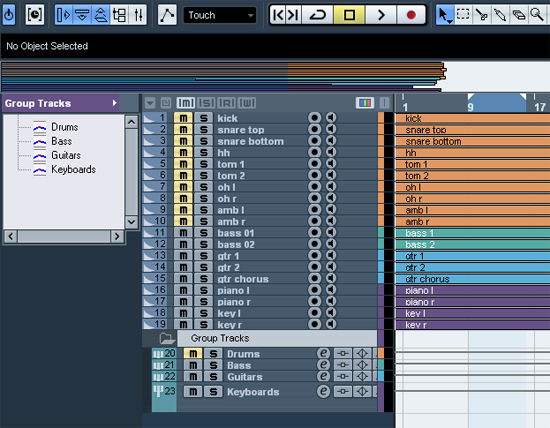
You can change this functionality in the Preferences at the VST page.
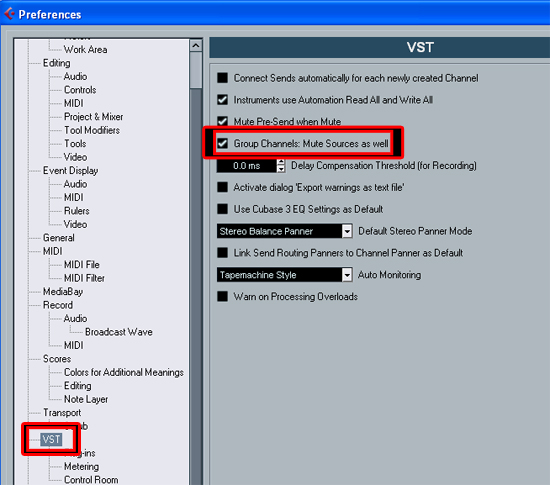
If you deactivate the option “Group Channels: Mute Sources as well”, muting a group channel will mute this group channel track but all channels that are routed directly to that group channel will remain unmuted. This means that if any of those channels have aux sends routed to other group channels, FX channels or output busses, those will still be heard.
The drums group track muted (Mute Sources as well deactivated).
Next time, we will continue to organize and prepare the project session. We still have to create folder tracks, check the phase cancellation on the snare, edit some audio tracks and set configurations of the mixer.
I think you need more coffee before you can finally put your fingers on the mixer…

