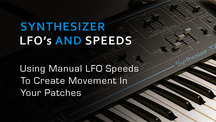
Adding expression to our music is always welcome and you’ll probably always be looking for new ways to make your projects more interesting. Modulation is great for this purpose and one of the most useful modulators is the humble LFO or Low Frequency Oscillator. LFOs are often hard synced to a DAWS tempo and all sorts of great rhythmic effects are attainable this way but an often overlooked technique is to use your LFOs in a free running mode. Let’s take a look at how we set this up in a popular soft synth and how we can use the effects produced…
Step 1: Setting Up The Raw Sound
First up you’ll need to choose the sound you are going to modulate and this case I’ve gone for about the most simple patch you can get. It’s simply a single un-filtered saw wave. In fact this is taken from the tutorial bank in Logic’s ES2 and as you might of already guessed this is the synth we’ll be using here.
I’ve simply recorded a single note 8 bars in length and ensured there is no modulation or processing being applied to our super simple patch. This is the perfect way to start any custom patch as ay changes can be heard clearly.

Step 2 Engaging An LFO
Now we need to engage our LFO. This simply involves mapping the LFOs output to any destination in your synth. In this case I have mapped the LFO to the filter’s cut off frequency.
In the ES2 this is done by using the excellent mod matrix but this technique will vary depending on the actual synth you are using. Generally this process if pretty straight forward.

Once you have made this mapping you may start to hear some modulation occur , in the next step we’ll look at how you can start to control this and which parameters you should use.

Step 3: Standard Synced LFO Effects
The most common way of using LFOs is probably syncopating their movement with the BPM of the your current project. You can usually choose a musical measure within the LFO’s speed parameter. This tight syncopation will often produce great rhythmical effects and is a nice way to create an instant groove.

This is a nice effect but we are going to take a look at how to use the LFO in a free running, non syncopated mode.
Step 4: Free Running LFOs
When an LFO is set to a free running mode it’s speed is in no way linked to your project’s BPM and you can adjust the speed manually. This gives you a fair amount of freedom and allows you to experiment with anything from slow undulating effects right the way through to super fast vibratos and cross modulation.
Adjusting the LFO speed yourself is all very well but in most studio situations you’ll probably want to automate the effect so that you have absolute control over the sound throughout your project.
Step 5: Adding Automation To Introduce Variation
In this case I decided to demonstrate the effect by going from a very slow LFO speed to a pretty fast one and vica versa. This was achieved by drawing an automation ramp controlling the LFOs speed parameter.


The effect is very different depending on which way you move and has all sorts of musical applications but is especially useful for builds, breakdowns and transitions. Obviously you might want to experiment with more complex patches and combine the end result with effects such as reverb and delay.
Hopefully this will be useful to you and you can use it in your own productions.
Original post from Audiotuts.