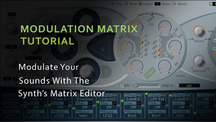
One of the things that many of us overlook in our early production days is the modulation matrix of our synths. I’ve used Logic’s ES2 as an example here, but most soft synths will contain a modulation matrix that is similar. In any case, the concept is the same, regardless of exactly how/where your modulation matrix is displayed.
Let’s get into the basics of the modulation matrix. I’ve zoned in a bit closer on the modulation matrix in the image above. If you look closely you will see that there are two main sections: Target and Source. There’s also a “Via” section. This model is repeated a number of times in your modulation matrix. Let’s have a closer.
Source –
think of this as the parameter that is going to control (or “modulate”) your destination/target.
Destination/Target -
think of this as what you are wanting to control or “modulate” with something else.
So, in the example above, Pitch is going to be controled (or “modulated”) by LFO2. (The amounts of modulation are set using the triangular shaped green/orange buttons)
Via –
this is an extra option that gives you additional control over the modulation. It can be left blank, but in some cases you might want to make use of it. In the case above, the choice is to modulate Pitch123 with LFO2, via the mod-wheel. What this means is that moving the mod-wheel will change the parameters of LFO2, which in turn is going to modulate the Pitch123.
OK – so enough of the tech-speak. Why use it?
Well, for one thing, just going into the modulation matrix and playing around with different combinations of Source and Destination/Target will automatically give you a unique take on the pre-set, and make the sound more your own.
Secondly, modulation (or change) is what makes things interesting in a track and less stagnant. For example, if you set up your filter cuttof to be modulated by the LFO via a third parameter, and you automate changes in these over the track, you are going to get some more interesting and slowly changing sounds that give your track more life and movement.
Again, you will see that there’s more than just one place in the modulation matrix where you can effect your sounds, so think of the possibilities. There’s no hard and fast rule on what should modulate what, and part of making music with synths is your own discovery. So just get in there and start playing around with sounds – let the modulation matrix on your synths give you a personal touch on presets and bring some movement to your sounds.
Here’s a little video from Cubase Guru on the matrix in Albino, just to help emphasise that the concept is basically the same whatever synth you are using.