Hollin Jones shows us how Reason 7 can send MIDI to the outside world in this Reason 7 External MIDI Hardware Tutorial Part 1. This feature opens up a wealth of creative possibilities in your studio
Reason has always been very good at getting MIDI in from keyboards, control surfaces and other devices to enable you to play and program its many instruments. Version 7 brings a new feature in the form of MIDI out and it’s integrated in typical Propellerhead fashion: unobtrusively and efficiently.
Before we go into detail about how it works, let’s briefly think about why MIDI out is such a big step forward for this much-loved DAW.
Although Reason is particularly good at generating sounds and effects virtually, many studios still have a lot of MIDI-triggered hardware lying around. Vintage kit such as drum machines and synths are generally equipped with MIDI, and anything more recent – like a workstation – definitely will be. Indeed, new hardware offering MIDI as a means of controlling it is being developed all the time.
Reason’s sequencing tools are especially fun and powerful to work with, and devices such as the RPG-8, the Matrix Pattern Sequencer and the ReGroove system for real-time groove quantization make it easy to create great-sounding parts. And the sequencer itself makes MIDI and pattern editing a breeze.
So while this is all well and good for triggering stuff in the Rack, imagine if you could also use it to program your classic drum machine or vintage keyboard. Well, now you can, and it doesn’t end there. Unless you are running your mix through a hardware desk you will almost certainly want to record the results of external MIDI triggering back into Reason, and this is easy to do using a simple interface so the whole thing becomes a loop. And thanks to the new audio-slicing tools, you can turn recorded parts into REX loops with just a few clicks.
First Steps
The first thing you will need to do is tell Reason which MIDI interface to use, which you can do in the PreferencesAdvanced section. Most audio interfaces also have hardware MIDI in/out ports, so make sure that you select the relevant interface.
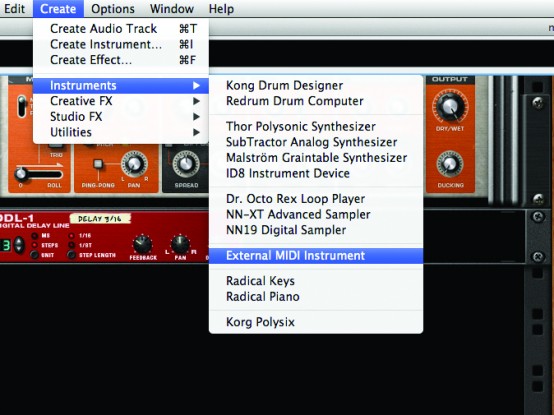
If you are using a MIDI-only interface, choose that. There’s nothing to prevent you from using separate MIDI and audio interfaces, though in many cases one unit will do both. Now go into your project, locate the Create menu and choose to create an External MIDI Instrument.
Once created, a small module will appear in the Rack.
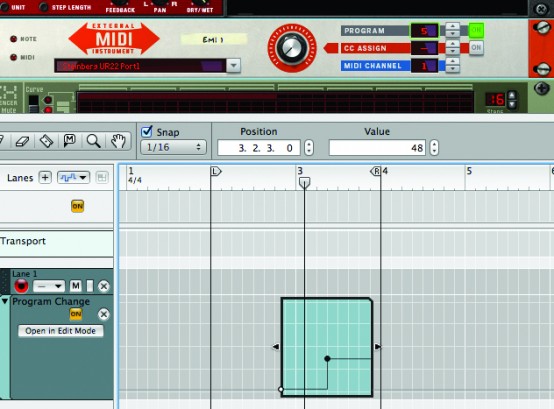
In the EMI’s output selector, choose the MIDI interface you specified in the Preferences and the module will be routed to it.
Of course, you will also need to make sure that you have a MIDI cable connected from your interface’s MIDI out port to the MIDI in port on your keyboard or drum machine and that it is set to receive on the correct channel (typically channel 1 unless you are using several devices). You may also have to set the instrument to external rather than local MIDI control and connect its audio outputs to something so it can make noise.
In many cases this could mean routing it back into Reason, in which case you need to create a new audio track. Make sure that this is set to receive audio from the inputs to which you have connected your instrument’s audio outs.
With these steps completed you should find that sending MIDI from the EMI or its sequencer track triggers the hardware and the resulting sound plays through the audio channel you just created. You will probably be able to hear the audio from the instrument without creating an audio track for it since it is playing through your interface, but to actually capture its output you will need to create a track to record it.


