Mastering is the very last stage in music production before your tracks go out into the world. It's an important stage. If you skip it, your tracks are almost guaranteed to sound weak when compared to like-sounding commercial material. In part 1 of this mastering audio tutorial, we'll look at some of the basic elements of a typical mastering chain and how they can be put to use.
There are many creative decisions that go into making a successful mix. If all has gone well on your project in the mixing stage, you should have a number of stereo files that ‘hit the spot’ when listening back on your speaker system. But there’s one last stage to go – mastering.

What Is Mastering?
Some years back, mastering was regarded by many as the preserve of high-end studios with big budgets who could afford to invest tens of thousands of pounds in specialized hardware equipment and professionally designed listening environments. Getting your tracks mastered here, especially by an experienced engineer, could be eye-wateringly expensive!
Top-end studios still often use dedicated mastering hardware, but in recent years much of this outboard gear has been replicated in software form, and at a fraction of the cost.
Software suites like T-RackS, iZotope’s Ozone, and WaveLab, can do all the basic jobs you need, like ‘topping and tailing’, adding PG codes, and normalizing. In addition, these sophisticated plug-ins can apply whole track compression, EQing, and even stereo enhancement.

T-RackS mastering suite
It’s quite common to chain together a number of plug-ins to form a typical mastering set-up. These might include a compressor, a limiter, a stereo widener, and some EQ.
The order in which these are placed will vary according to taste, but if the material you’ve been working with is at a higher sample and bit rate (say 48kHz and 24bit), it is usual when mastering to CD to leave the dithering down process until last.
Many dedicated mastering suites contain suites of effects linked together, and even some handy style presets to get you started. This is not a bad plan to follow, especially as you will most likely be able to easily do quick A-B comparisons between different options to see what they sound like.
A word to the wise here though: Always trust your ears rather than the name of the preset!
Do It Yourself Mastering?
Let’s suppose your client wants to hear how progress is going on his latest project. You have a mix of his track to hand; maybe it’s close to finished but still needing a ‘tweak’ here and there. These days, it’s often advisable to apply a lick of mastering before the client hears his track, otherwise he or she will likely be sidelined into complaining that the track is weak, or too quiet, and not focus on any arrangement issues that are still to be decided.
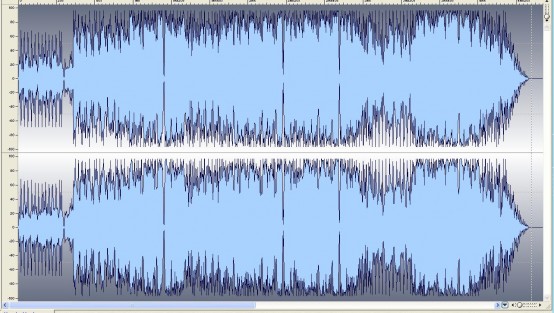
So, how to begin? Before doing any mastering processing, I normally ‘top and tail’ each track, so it starts cleanly and concisely, and finishes with a natural sounding fade on the last chord, if the track has a definite ending. Lengthy fade-outs are perhaps best left until later, as your perspective can change a bit after the mastering processes have been applied.
If any edits need to be performed—for example, a chorus at the end needs taking out, or different mix sections of the same track need to be cut together—it’s not a bad idea to do these also at this stage, before attempting any mastering processing.

Done that? Now lets work on the actual mastering. First listen carefully through to the track, preferably in a good listening environment you know well.
- Does the bass stand out enough?
- Are you happy with the EQing on the lead vocal?
- What about the high end? Does it sound crisp and clear?
- is there enough strength or ‘weight’ in the track?
It’s often useful to have a stack of commercial CDs on hand to give you a means of comparison, especially if they are similar stylistically.
Once you’ve decided what needs to happen, you can then begin to set up a mastering processing chain.
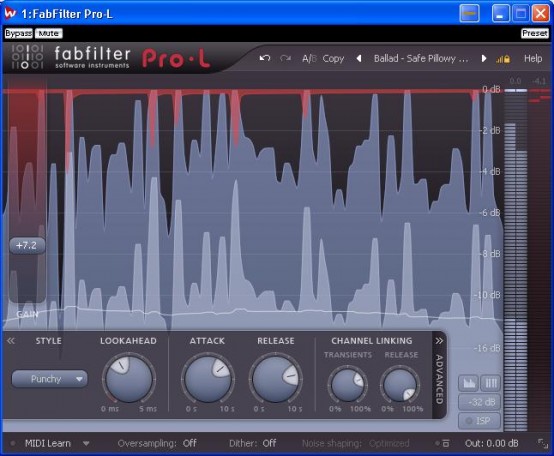
- Whole track compression is best applied gently, perhaps a ratio of between 1.5:1 and 3:1, with a threshold that’s not too vigorous; maybe between -20 to -10dB.
- A good limiter will allow you to raise the overall volume level quite a bit without distortion occurring; try to aim for a solid and strong average level but avoid peak distortion by the use of soft clipping.
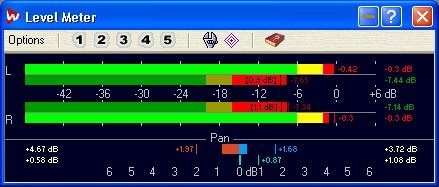
- Normalising is a vital part of mastering. By all means, go for a firm level increase to keep your track punching its weight with the best of them. But see ‘the loudness wars’ in Part 2.
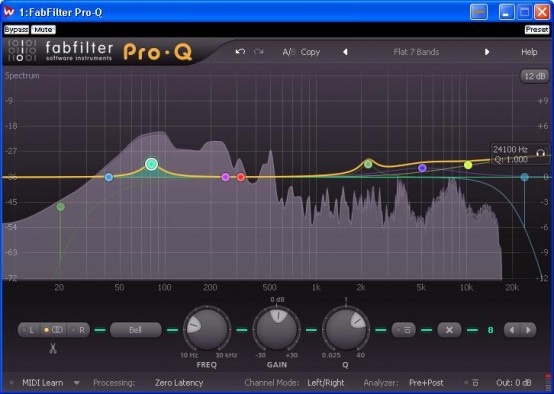
- Finally, what kind of overall EQ should you apply? This is highly subjective and depends on the style of the music.
The type of speakers you used to mix on will have also played an enormous part in the sonic make-up of the track. That’s why it is always best to master on a completely different set of speakers if at all possible.
If the top end seems a little dull, try lifting the EQ at a suitable high point (say between 8kHz and 10kHz) to bring in ‘air’ without harshness. The bass end will be critical; here the trick is to arrive at a sound that is solid and punchy without being overwhelmingly dominant.
A word of caution: If the bass end is pushed too loud, it will certainly sound distorted through normal hi-fi speakers—so watch your bass drum levels carefully!
There are no hard and fast rules about which order you apply these processors. Always use your ears to make the final judgement.
Conclusion
Stay tuned for Part 2 of the tutorial. This will cover:
- Can I do my own mastering?
- The loudness wars – hot and spicy, but not too hot!
- Mastering compression and limiting explained
- Stereo enhancement