This tutorial demonstrates how to use the velocity curve to improve your melodies.
Velocity is heavily under rated and many producers don’t use at all. If you learn how to use it, you’ll see how helpful this tool actually is.
Step 1: Create a Single Pattern on a MIDI Channel
So create a MIDI track and load an instrument. In this case we’ll choose Sylenth. Now draw some notes – if it possible an arpeggio pattern. Create a patch and listen what happens.

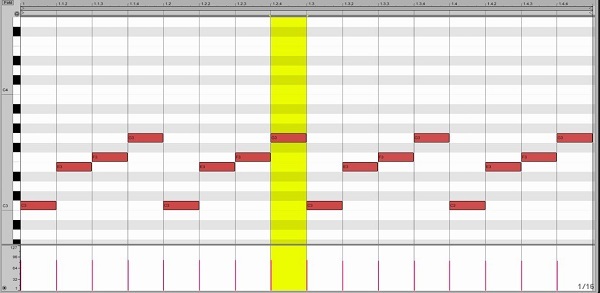
Now you have a simple arpeggio pattern but it is really boring. You have several techniques to make changes to the arp line. The most useful technique is to play with the velocities.
Step 2: Set Up the Velocity Destinations
In order to velocity curve take an effect you have to assign to certain parameters which will be the destination of the velocity curve. We often think that velocity only controls the volume of each note. The truth is that velocity can control any assigned parameter, which can be pitch, filter, LFO gain and many more. The great advantage of the velocity is that it can control numerous parameters at the same time.
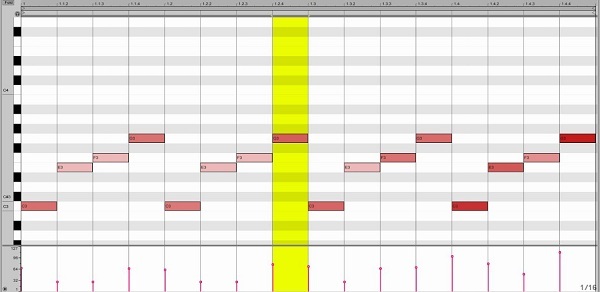
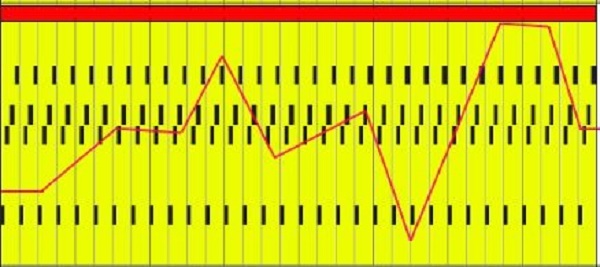
In our case the velocities will control the filter cutoff and the LFO 1 Gain – which modulates the pitch of the instrument. You will generally set up your routing in the Mod section of your synth. As you can see in the very first image of Sylenth, I have selected velocity as the source to modify both Cutoff AB and LFO 1 Rate. Now that we have the velocity set to modify these parameters, we will redraw our velocities. You can copy my pattern below, but I highly suggest to use your own imagination and create something unique. With the velocity variation and modification of the filter and LFO, the pattern now is much more interesting and more pleasant to our ears.
Step 3: Use the Velocity Effect
While you can manually alter your velocities, many synths and DAWS have their own velocity effect, which controls the behaviour of your note velocities. Ableton Live has an effect which is called Velocity.
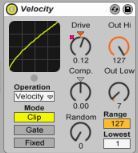
Velocity can alter incoming MIDI note velocity values (1-127) in either a controlled or random manner. It can function on MIDI Note On (Velocity) or Note Off (Rel. Vel.) messages, or both, depending on the settings you choose. So if you would like more complex velocity curves you can use this effect. In our case I used the drive control to make the pattern more complex. Furthermore I automated on the whole pattern so now we have a really short but a really interesting arpeggio line. So as you can see the velocity can be really effective if you are using in a right situation.
Original post here.