Music Production is a funny business. We can labour away under the same conditions, making music with the same tools, and then all of a sudden, often thanks to a studio accident, the game is changed when someone comes up with a completely gamechanging sound or effect. Maybe it’s an 80s gated-reverbed snare sound, perhaps a white noise riser, or a ridiculously strong auto-tune effect that takes on a new character.
With so many producers trying to make so many different styles of music, we always come back to the same, tried and tested formulas. These sounds may be cliche to some, but there’s a reason for that: they work.
In this article, we’ll take you through seven of the most heavily used tricks in music production, showing you how to create each one of the now-common tropes within your DAW. Use the contents list below to navigate to any particular one.
IN THIS GUIDE
– Auto-Tuned Vocal FX
– Gated Reverb
– Pumping Sidechained Mix
– Pitched-Down Vocals
– Vocal Spot Delay
– White Noise Riser
– Reversed Reverb
Auto-Tuned Vocal FX
Since being revealed to the universe in Cher’s 1998 single Believe, and then all but disappearing, the effect of overly Auto-Tuning a vocal line as an intentional effect returned in the 2010s as a staple of pop music production, most notably lashed all over the vocals of T-Pain.
The most notable plugin used to create the Auto-Tuned effect is… well, Antares Auto-Tune, although there are more pieces of software created specifically to mimic the effect on its own. The more recently released Auto-Tune Pro can do the effect with just a couple of controls.
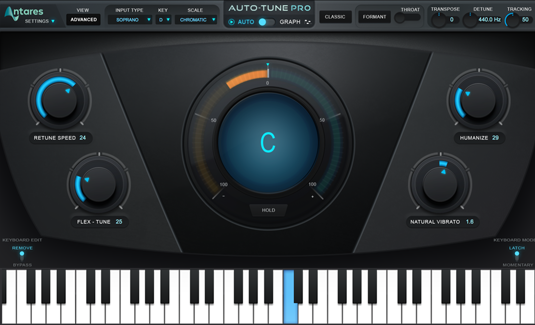
Most basically, the effect is created by cranking Auto-Tune’s Retune Speed dial up to the quickest it can be, and setting the plugin’s key correctly. Once that’s done, the vocalist only needs to sing the intended original melody in the right key, and Auto-Tune will constantly conform it the notes, minus any drift in pitch, exactly to the ‘correct’ note. The result is a robotic-sounding vocal line that slavishly stays pegged to exact notes.
How to Create it
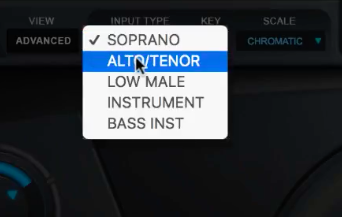
First, set your Input Type. This should reflect the type of voice that’s singing into Auto-Tune. This helps Auto-Tune understand what it’s going to hear, and therefore what to do to process it.
First, set Auto-Tune’s key to the key of your track, which will help it to understand the notes it should be snapping the vocal line to.
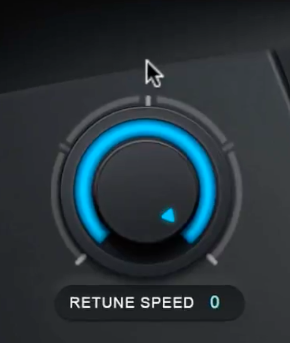
Whip the Retune Speed up to 0, the quickest it can possibly be. and set the Tracking to 100.
Switch on Formant, and set the Formant Amount to about 80. Leave the vibrato off to make sure the tuning is strict and tight.
This is just a starting point, but should get you set up with the basic, cliche extreme Auto-Tune sound. Experiment further, but remember to save the preset of the basic sound for later recall.
Of course Autotune can be used for more subtle pitch correction as well.
Gated Reverb
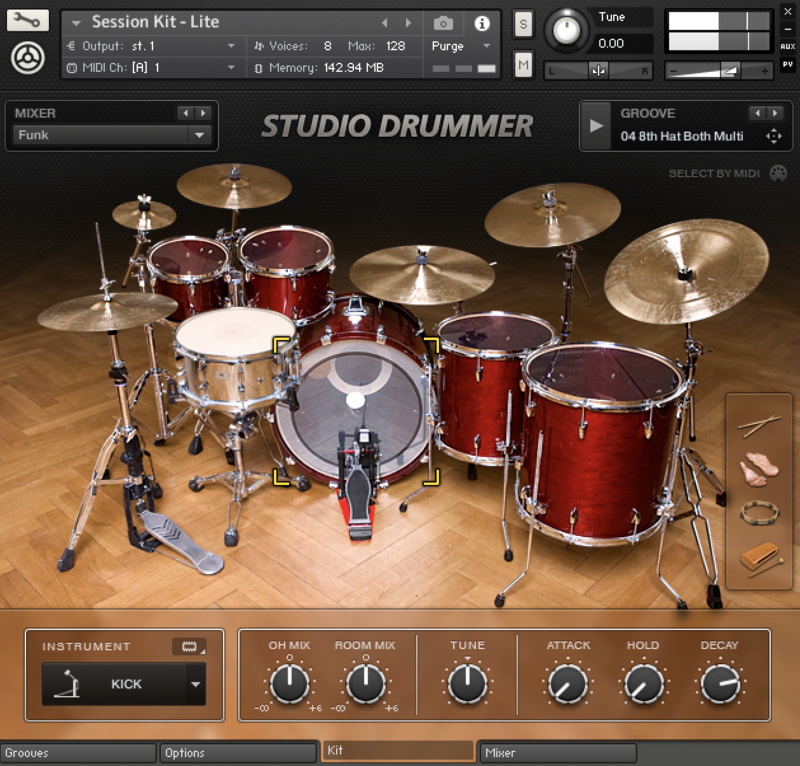
It was the sound of powerful – if not slightly overcooked – 80s drums, with songs like In The Air Tonight bringing the gated snare sound back into the public consciousness more recently. Once a major effect in studio technology, then left on the trash pile with the rest of the cliche music production effects, that classic Phil Collins 80s drum sound is just a few clicks away if you know what you’re doing.
Most basically, a Reverb is placed on a mixer return channel, as ever, only then a gate is placed right after it. The overall effect is that the heavy reverb takes up the tail of the snare sound, and then cuts out when it’s fallen to a certain level. The result is a little extra sustain on your snare, plus a nice sense of space, which cuts out in time for other instruments to make an impact in the mix.
How to Create it
It’s most sensible to start creating this effect using a Send/Return combo, sitting the reverb on a separate mixer channel. This means that you can control the original snare and the effect separately, and when we add the gate plugin to affect the reverb, it won’t mess with the original snare sound either.
Whether you’re just looking to get the effect on your snare, or on your toms too, make sure the channel for each of these drums is being sent to that reverb bus/return.
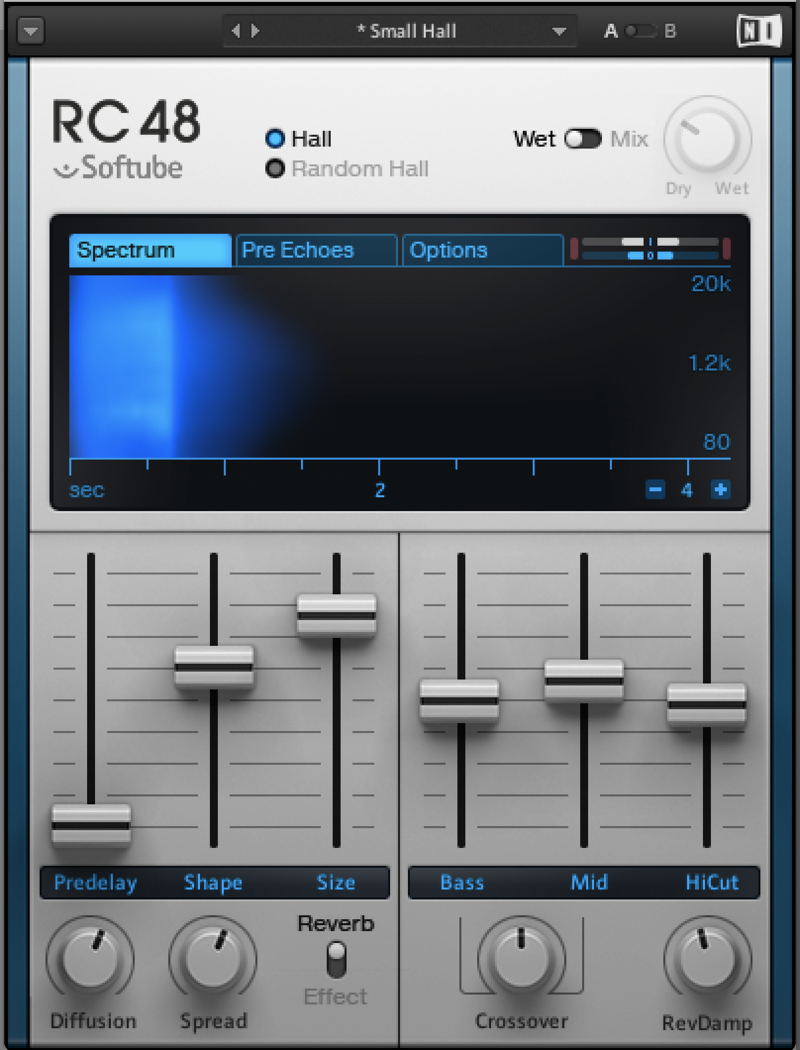
Send your snare channel to the reverb return – a classic 80s reverb plugin would go especially well here – and really push it. Create a ridiculously large amount of reverb.
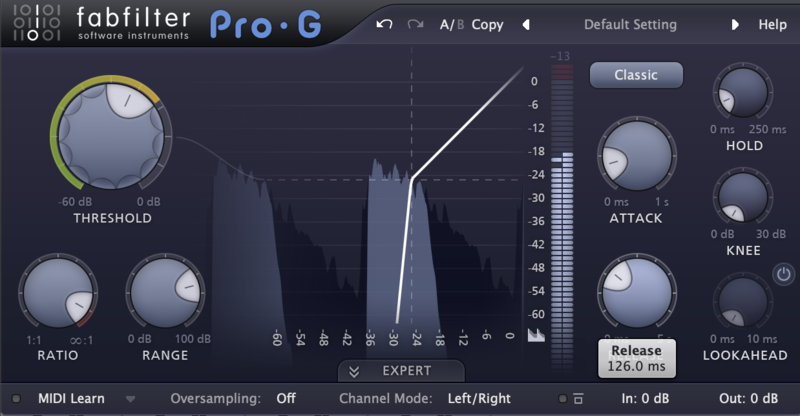
Next, insert a Gate plugin over the reverb channel, and set the Threshold to 0, effectively silencing it for now. Set the Release at an initial 200ms, and we’ll tweak it later.
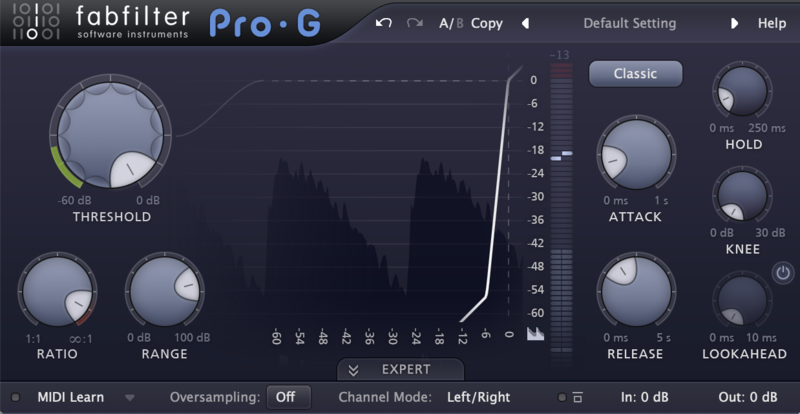
Now, make sure the drum tracks you’re feeding into the reverb are playing, and slowly bring down the Threshold until the sound of the reverb is audible.
Now start tweaking the Release time (you can also use the Hold time if your gate has that parameter). Raising this means the reverb is denser and heard for longer; lowering it means the reverb will be snappier and less noticeable.
More Ways to Tweak It
Alternatively, you can also sidechain the Gate signal from the original Snare track. The effect may be similar, and you might need to tweak the Threshold, but ultimately this method can sometimes offer more control over the gated reverb sound.
Also see how the sound differs when the Reverb’s EQ controls are changed. If your reverb doesn’t come with EQ, you can insert an EQ of your own between the reverb and the gate. This change in tonality might cause the gate’s settings to need refreshing a little, for the right sound.
Check out our video on how to create this effect in Ableton here.
Pumping Sidechained Mix
If there’s one thing Eric Prydz and Daft Punk have taught us, it’s that compression isn’t just for individual instruments. While compression is often used to subtly adjust levels and to increase loudness, the sidechain compression that took the world by storm was an extreme version of an existing idea…
How to Create it
Let’s say you’ve got a long, sustained sound like a pad or an atmosphere on one channel, and a transient sound like a kick on another. If you place a compressor on the pad channel, and use the kick’s signal as its sidechain input, the pad starts to pump to the signal of the kick.
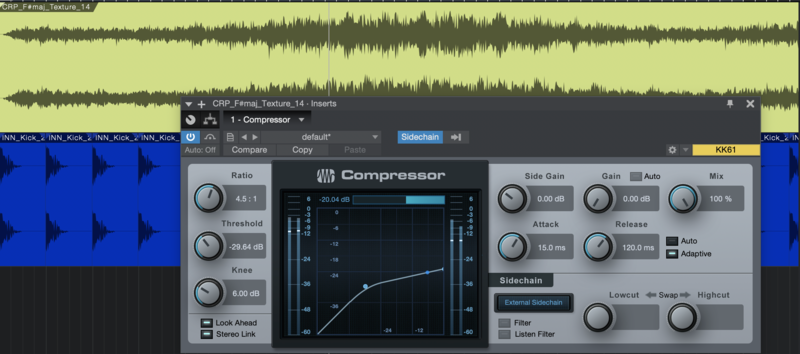
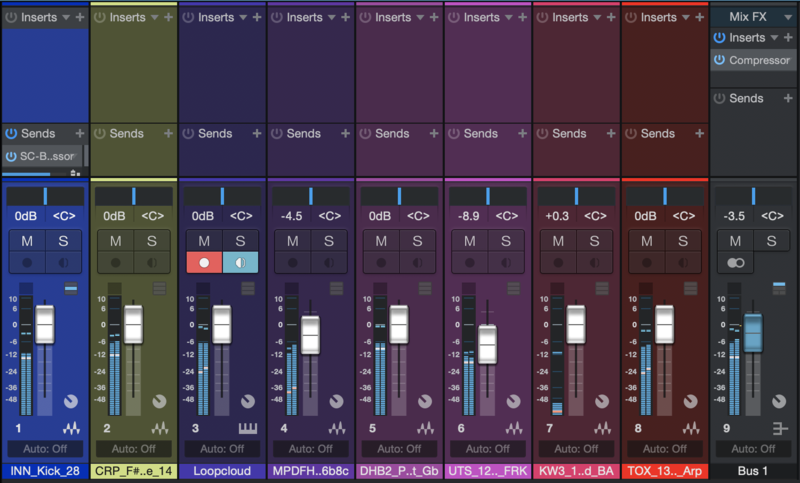
The innovation from the mid-00s producers was to instead start pumping almost every element of the mix using the kick signal. To do this, simply create an output bus for the other channels in the mix (not the kick), and slap the sidechained compressor over those instead.
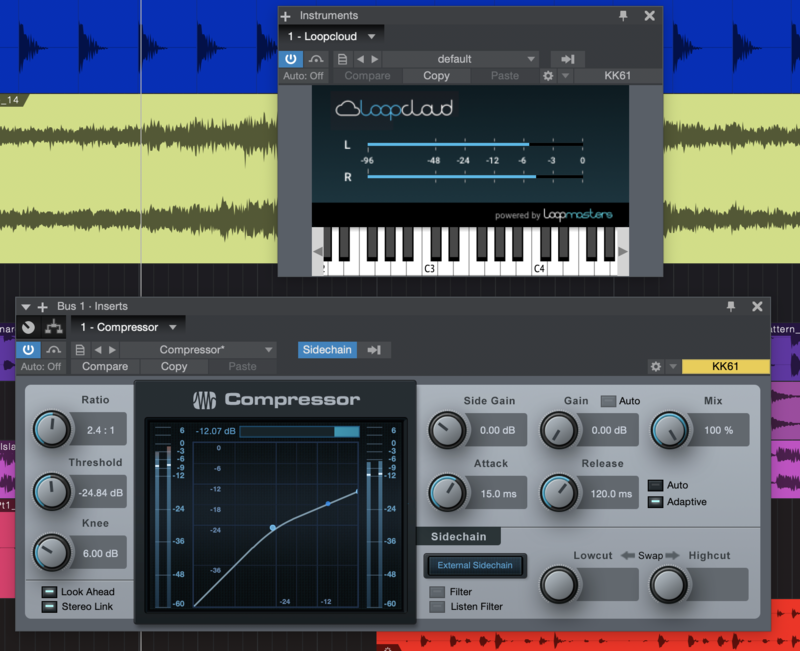
Crucially here, you can remove certain elements that you don’t want to pump – often things like vocals and percussion – by sending their channels back to the main output instead of the pumping bus.
Instant Sidechain Pumping
Ever willing to solve a problem by providing an immediate solution, software developers have risen to the challenge of providing instant solutions for sidechaining effects. This means that, instead of having to route a sidechain signal from the kick to a compressor, you can simply set a particular plugin up over the elements you want to pump, set the rate, and get instant rhythmic gratification.
Plugins like Xfer Records LFOtool, Devious Machines Duck and Cableguys VolumeShaper are all good examples of getting the instant sidechain pumping, ducking effect.
If you want inspiration for some creative sidechain uses check out this video from Keith Mills of Quantize Courses.
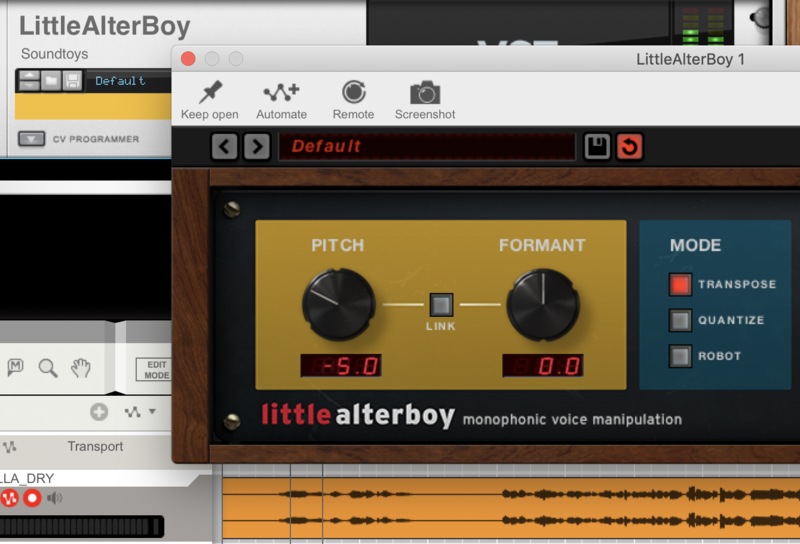
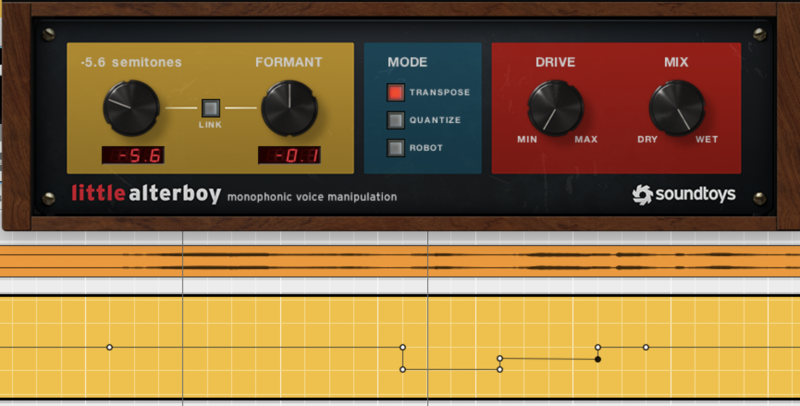
Pitched-Down Vocals
You know the idea: there’s a vocal line going on, but it changes in pitch – whether throughout or just at the end of a line. It’s not Auto-Tune, it’s more serious than that, and the whole vocal has been retuned in order to make a special effect out of itself.
Pitchshifted effects can bring a whole new spirit to a vocal track, and make something that’s truly unique from a previously run-of-the-mill sample. For some sonic inspiration, check out our own Vocal Sample Packs and Acapella packs such as Big Room Dance Hooks and Siren by Veela, or search Loopcloud for instant one-off vocal samples.

How to Create it
In short, this effect is created using a pitchshifter plugin. It’s very likely that your DAW will have on of these of its own, but other alternatives include Soundtoys Little AlterBoy, DMGAudio Pitchfunk and others.
It’s pretty simple to create a pitchshifted vocal sound – just bring the pitchshifter’s main control down, or up, to hear that altered vocal sound.
If your particular pitchshifter has its own Formant control, you can use this instead of the Pitch control, or in addition to it, bringing it in the same or opposite direction for a variation on the effect.
But the real trick with the pitchshifted vocal effect is to kick it in at certain points during your tune. Once you’ve come up with the effect you’re after, note down the settings, and set the controls up for automation in your DAW. (If you’re not sure how your DAW handles automatable controls, check out its website or manual).
Using the newly created automation lane, you can now leave things as normal when you want to, and suddenly switch the settings just before a certain word or phrase, kicking the effect in exactly when you want it.
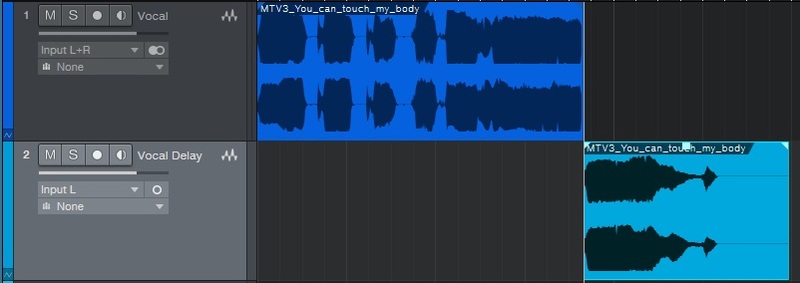
Vocal Spot Delay
The vocalist is singing, everything’s normal, but at the end of the line – right before the song transitions into a new section – everything goes quite and the last word of the vocal phrases echoes off into the distance.
There are two things to remember here: the vocal wasn’t echoing all throughout the rest of the track, and the only word that echoes on is the final word – none of the words that came before it. So how is it made? This effect is quite basic in DAW terms…
How to Create it
The reason for the vocal echoes were, of course, a delay plugin, but it was only active for the final word.
The chances are, the delay effect was placed on a Return channel, and the send level from the main vocal was automated to be off for the entire track, right until that one last word. When the last word hits, the send level is brought up and then back down again after. The result is just that word ringing out through the delay plugin.

Another option is to literally chop out that last word and host it on a separate track. That way, the delay plugin can simply be slapped onto that new track, and automation isn’t a concern.
White Noise Riser
In electronic music, one of the most basic recipes is on how to whip up a riser sound. This sound is often accompanied by a high-pass filter sweep as the track builds up to the drop.
How to Create it
Start with noise. Whether this is a sample placed in a sampler or on your DAW’s timeline, or generated by synth’s noise oscillator, it doesn’t matter. Add a low-pass filter over the noise and add some resonance. Now automate the filter’s cutoff to rise from low to high over a few bars, and hey presto, your riser has risen!

But that’s only a basic stock recipe for the white noise riser. To make something truly original, you don’t just have to stick to white noise: try adding tonal elements or other forms of noise, hum or anything else. Try different amounts of resonance and even using band-pass filtering instead of low-pass.
To go further with your riser, effects like flanging or chorus place before the filter work well, and delay placed after (or possibly before) can add extra depth. While you’re automating the cutoff over time, why not try automating stereo width, effects depths and more to make the sound truly come alive?
For more tips on how to create risers and other effects in Ableton check out this article.
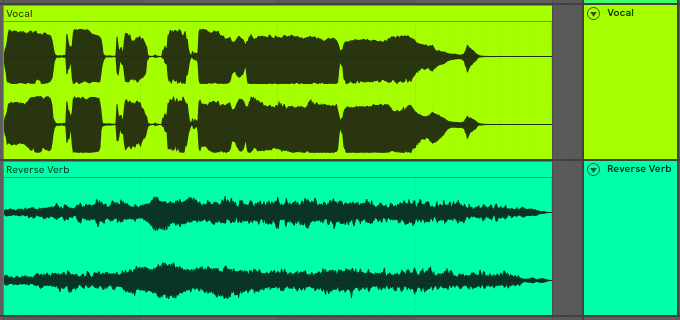
Reversed Reverb
This is an effect that goes in and out of fashion, although it’s got a large number of applications that work their magic in different ways. On vocals, it produces a ghostly foreshadow; on drums, it messes with the rhythm and the flow; and on melodic instruments, it can completely change a sound’s timbre. Watch Mike Koglin demonstrate the effect on some trance vocals here.
How to Create it
Getting a reversed reverb sound is easy if you know how your particular DAW handles bouncing and resampling. Our intention is to apply reverb to a sound, record just the reverb as a separate audio region and track, and then reverse that audio and place it back into the project.
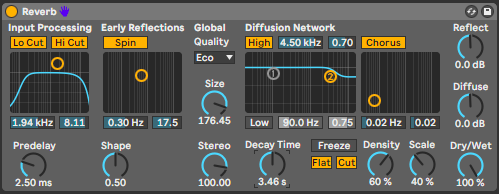
You can apply reverb to a sound by sending it to a Return channel. On your reverb plugin, set the Dry/Wet Mix to 100% Wet, making sure just the sound of the reverb is present on your return channel. If your DAW allows you to use the output of that return channel as the input to record onto another channel, this is the method you should use.
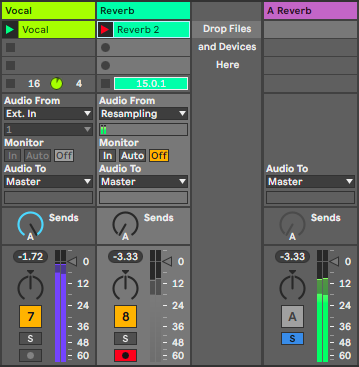
Alternatively, you can simply apply that same reverb, set 100% Wet, to your original audio channel, and bounce the result. Whether you do this by recording the output of one track into another in your DAW, or simply by isolating that region and hitting Export, it doesn’t really matter.
Once your reverb-only track is in your project in audio form, make sure you disable the original reverb process, and use your DAW’s commands to reverse that audio region.
Usually, reversed reverb works best when played slightly earlier than the audio it came from, but this really depends on context – it won’t always be the case. Now that you have the reverb rendered to audio, you can also start chopping, fading and doing anything else your DAW will let you.