
What Is Gross Beat And How To Use It – a Guide
There are a lot of plugins out there, but few have changed the production landscape as much as Image-Line’s Gross Beat. This PC-only VST effect plugin takes control of a signal’s time and level in a rhythmic way, giving you innovative, radical, and most importantly, musical control over your signals, giving you truly ‘Gross Beats’, or ‘Gross Anything Else’, for that matter..
The plugin might look intimidating to beginners, or hard to pin down when loading it for the first time, but this guide will show you exact how to use Gross Beat from the start, and will even cover some alternative plugins for users with lower budgets or those on a Mac. Luckily, whether you’re using the Gross Beat FL Studio version or loading the Gross Beat Plugin in another DAW, the setup is exactly the same.
Contents
– Getting Started with Gross Beat
– Curve Types and Scratching Patterns
– How it Works Behind the Scenes
– Volume Patterns and Finer Controls
– More Gross Beat
– VSTs Like Gross Beat
Getting Started with Gross Beat
To start, load a drum beat into your DAW and make sure playback is looped to repeat it. Also ensure that the beat sample’s tempo conforms to the tempo set in your DAW – otherwise, GrossBeat won’t be able to do its thing properly. You can do this tutorial using the FL Studio Gross Beat version, or using the plugin version in your DAW.
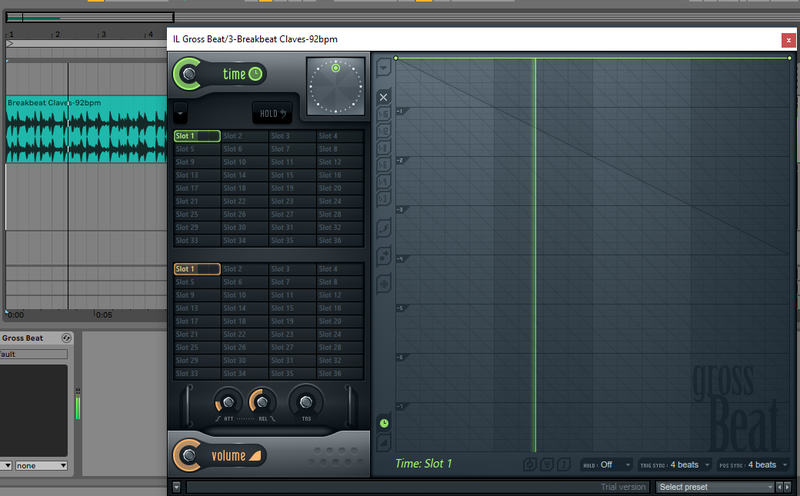
Above is the screen you’ll see when you load up the Gross Beat VST from your plugin browser. Let’s not waste time – we’ll dive right in at the deep end.
Turn to Gross Beat now. It’s in its default state, and it’s not making any changes to the audio. The action starts by shaping the green line over the main grid. Right now, the green line is running straight across the top of the grid, meaning that absolutely nothing is changed about our signal.
Right-click in the center of that line and you’ll create a new node on it. Left-click and drag this node two big grid lines down, to the -2 line, where it’ll meet the diagonal line. There’s also a node on the right-hand side of that line. Drag it down to the same -2 line, so you have the setup shown below.
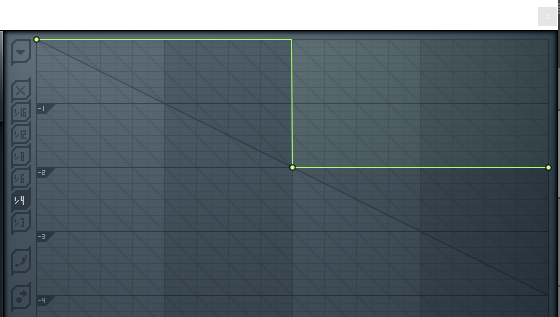
When you press play, Gross Beat will play the first two beats of the bar as usual, following the line’s position at the top. But for the second two beats, when the line is moved to the -2 position, it will actually play the previous two beats. In other words, it’ll play the first two beats of the bar twice.
Curve Types and Scratching Patterns
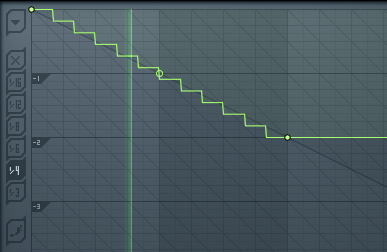
Next, right-click on the middle node, and it’s possible to select a different shape for the line that comes before it. Select Single Curve, and drag the circle that appears halfway down the line until you have a similar shape to ours below.
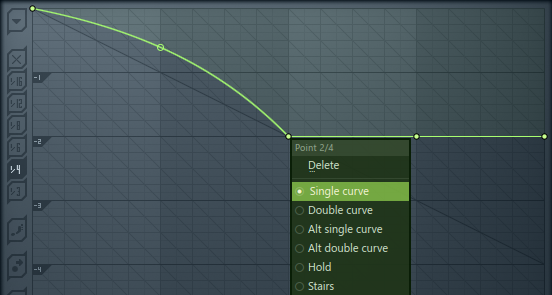
This gives us a time-bending effect that’s a lot like scratching a vinyl record. We’re just scratching the surface right now, but there’s plenty more that we can do with this sort of effect later on.
Now change the node to a Stairs type, and experiment dragging the middle circle to set different step sizes to that shape. Each type of stepped shape replays the first portion of the cycle for a different length and a different number of times.
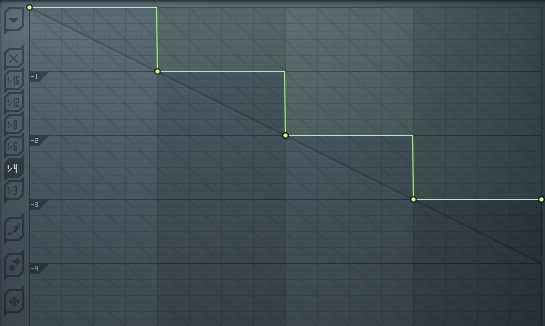
Reset that node’s curve type to Hold by right-clicking it. Hold is the default shape for any node. Now create more nodes to arrive at the shape shown below.
By selecting one of the numbered buttons to the left of the grid, you can ensure the nodes snap to the grid lines. We’ve got 1/4 selected to create this shape.
How it Works Behind the Scenes
So what’s actually going on here? As the loop starts to play back, Gross Beat listens to it and lets it through. However, by lowering a grid line, Gross Beat will actually play back an earlier part of the loop that it heard.
With this shape, the first beat is the correct time, the second beat actually plays what happened one beat back in time (ie, the first beat), the third beat actually plays what happened two beats back in time (ie, the first beat), and the fourth beat actually plays what happened three beats ago (ie the first beat). The result is the first beat, played four times until the cycle restarts after four beats.
Stop playback, and try setting up the grid so there’s just a horizontal line at the -4 point (as shown below)
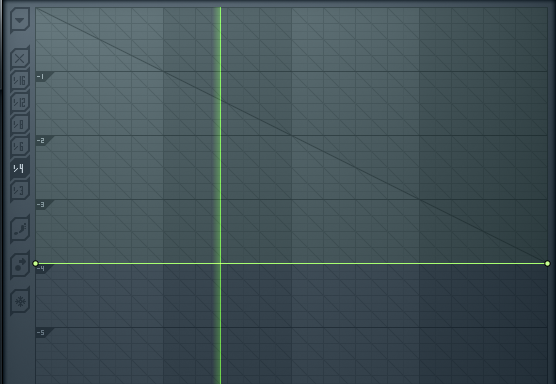
When you restart playback, you don’t hear anything. Actually, because Gross Beat is constantly playing back what happened four beats ago, you don’t hear anything until the fifth bar, at which point you finally hear the start of your audio loop.
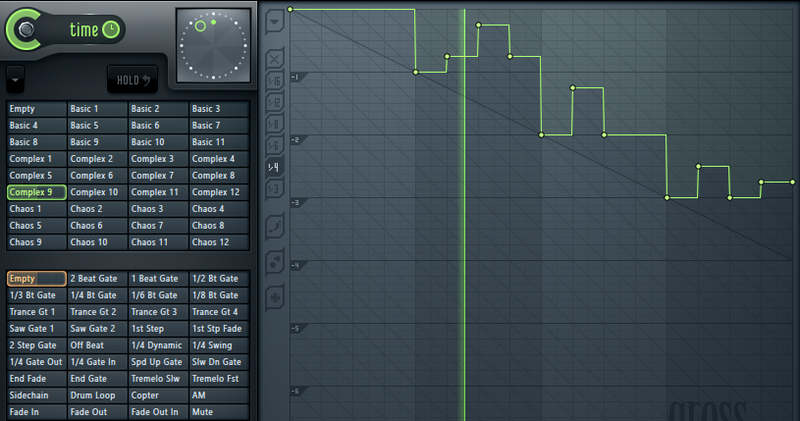
We’ve given you the initial tour of Gross Beat’s time-bending capabilities, and you should be able to figure out how to get some basic setups going. It’s time to see some of its more elaborate setups. In the bottom-right, click the Presets menu and select Patterns.
Use the top bank of 36 presets to bring up some predefined shapes and see what madness they make happen to your input audio. You can tweak the nodes in these patterns yourself, and by choosing the Default bank again, you can set up multiple patterns of your own to switch between later.
Volume Patterns and Finer Controls
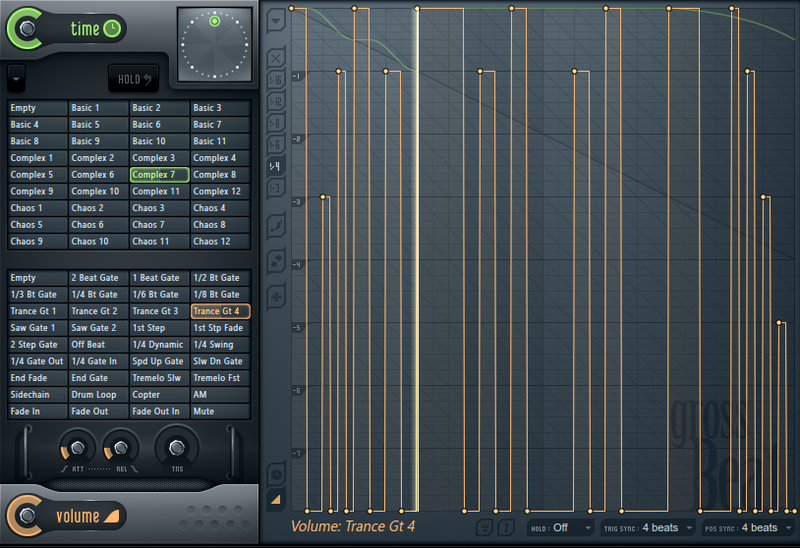
While you’re exploring the presets, it’s a great time to check out the other half of Gross Beat’s operation. As well as playing with Time using the green gridlines, you can also play with Volume using a similar set of Orange gridlines.
Select a preset from the lower bank of 36, and an orange pattern will join the green one on the grid. When the orange line is at the top of the grid, the volume is full; when the orange line is at the bottom of the grid, the volume is at its lowest.

There are a lot of preset Volume pattern to try, and the Volume grid is programmed in the same way as the Time grid.
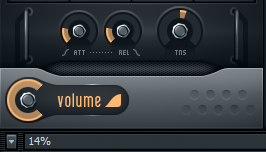
There are more, finer controls to explore on Gross Beat, such as the Volume’s Attack, Release and Tension dials, and the Dry/Wet knobs for each effect, helping you mix in the original signal to balance out the effect. Also check out the ‘clock’ control at the top of the Time section, for manual real-time scratching effects.
More Gross Beat!
Since Gross Beat is a VST plugin effect, you can save and load presets in the Plugin Options section. Gross Beat presets can be found for free or for sale around the internet, and a simple Google search will hook you up.
VSTs Like Gross Beat
If you’re using a Mac system or have a more limited budget, you might be looking for plugins like Gross Beat. Fortunately, similar effects are indeed available. Check out cableguys Halftime, or the more comprehensive TimeShaper and VolumeShaper, which are effects that slot into their ShaperBox package.
Xfer Records’ LFOtool has a similar approach to rhythmic volume-manipulation, and MeldaProduction MRhythmizer is also a great Gross Beat alternative, takes the concepts even further. Elsewhere, iZotope Stutter Edit and DMG Audio PitchFunk take these ideas into new territory, and for a sequencer-style look at effects, check out Sugar Bytes’ Effectrix.